Lock Information
The lock information page includes basic information and settings, access permissions, data export,and Room status.
1.Basic Information and Settings
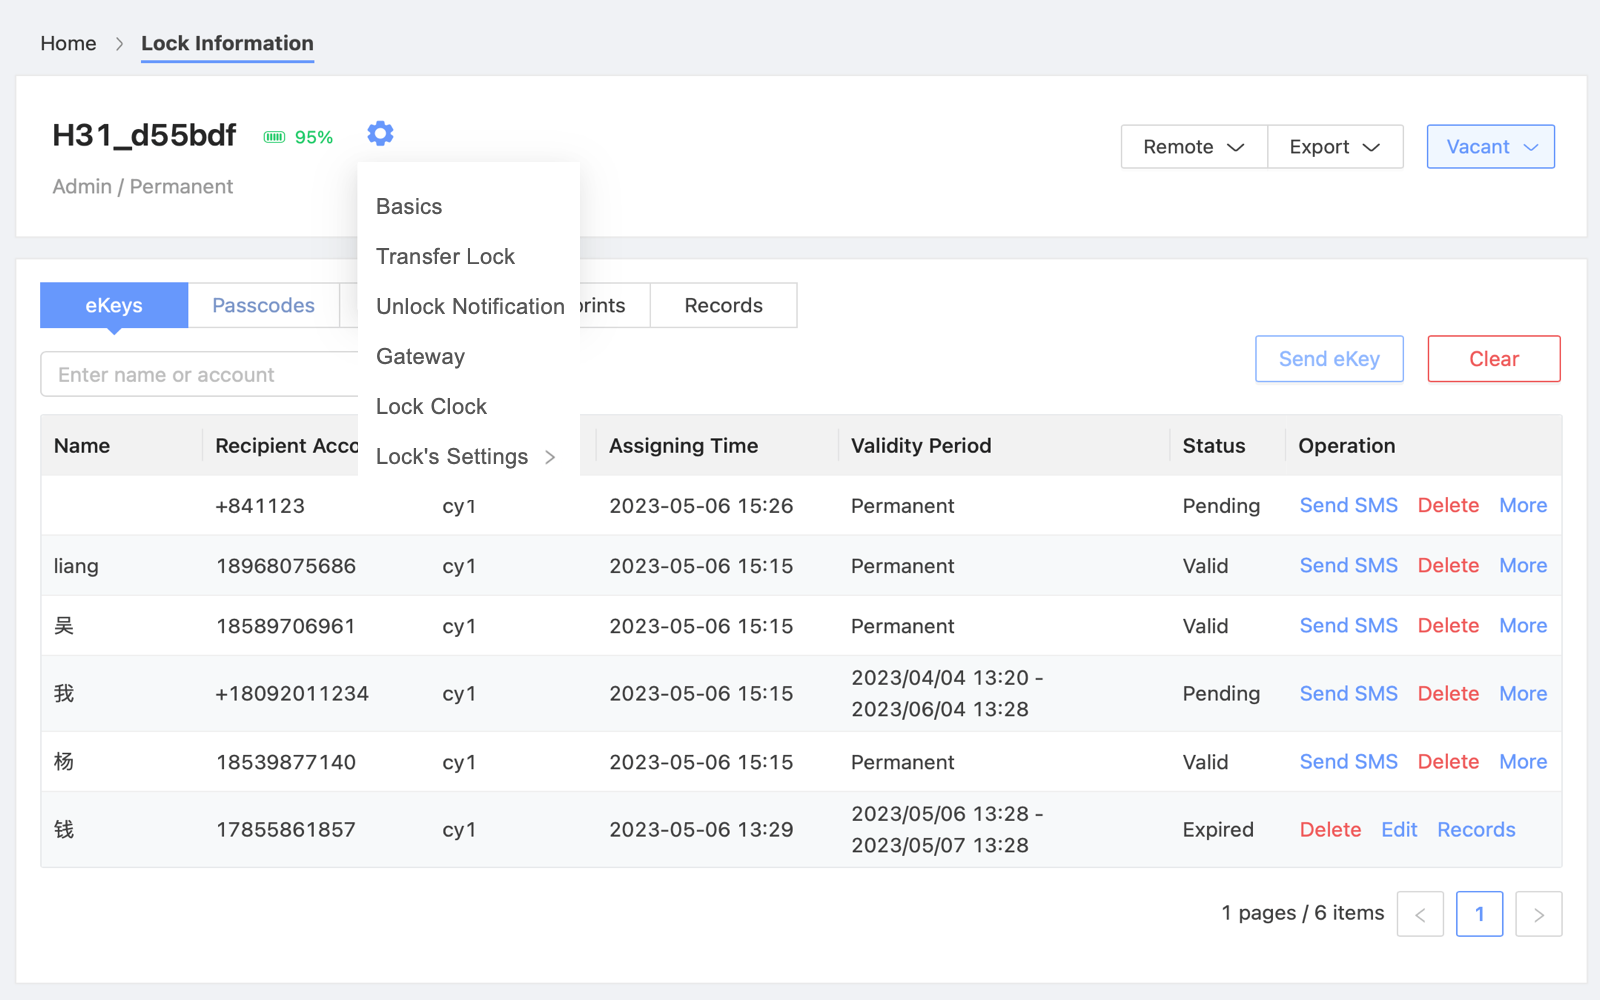
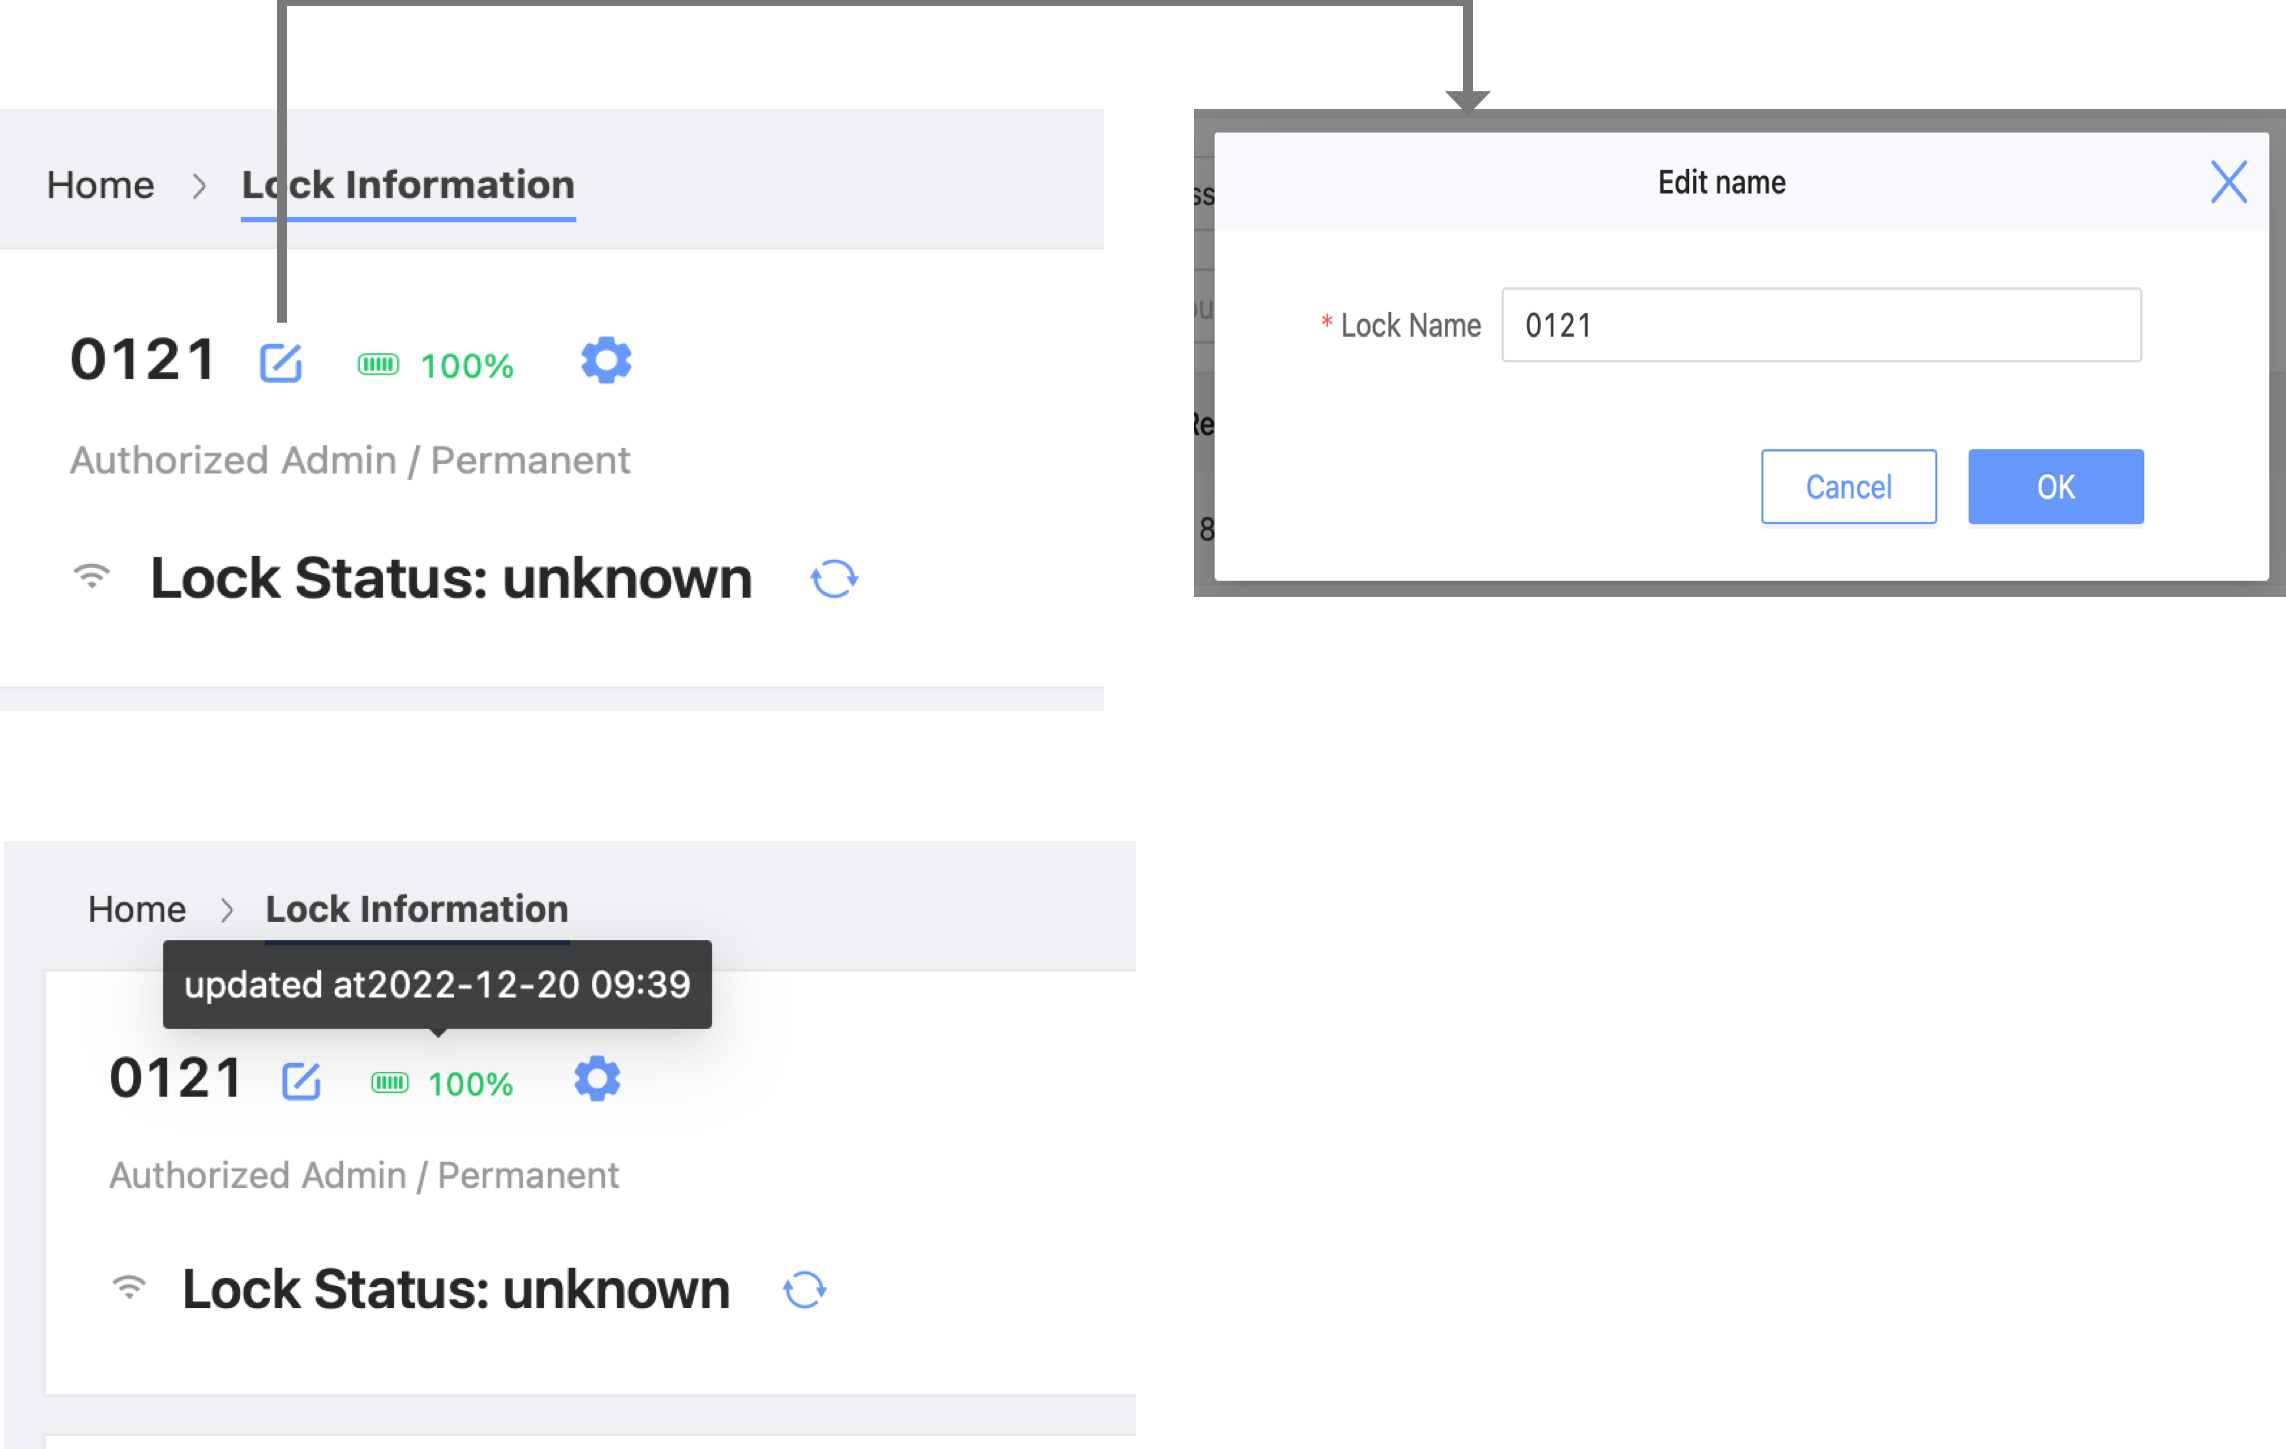
At the top, you can see the lock name, lock battery level, Battery update time,lock status, your identity, and the lock's validity period.
Click on the icon behind the lock name to modify the name in the pop-up box. Hovering the mouse over the battery level will display the update time of the battery level.
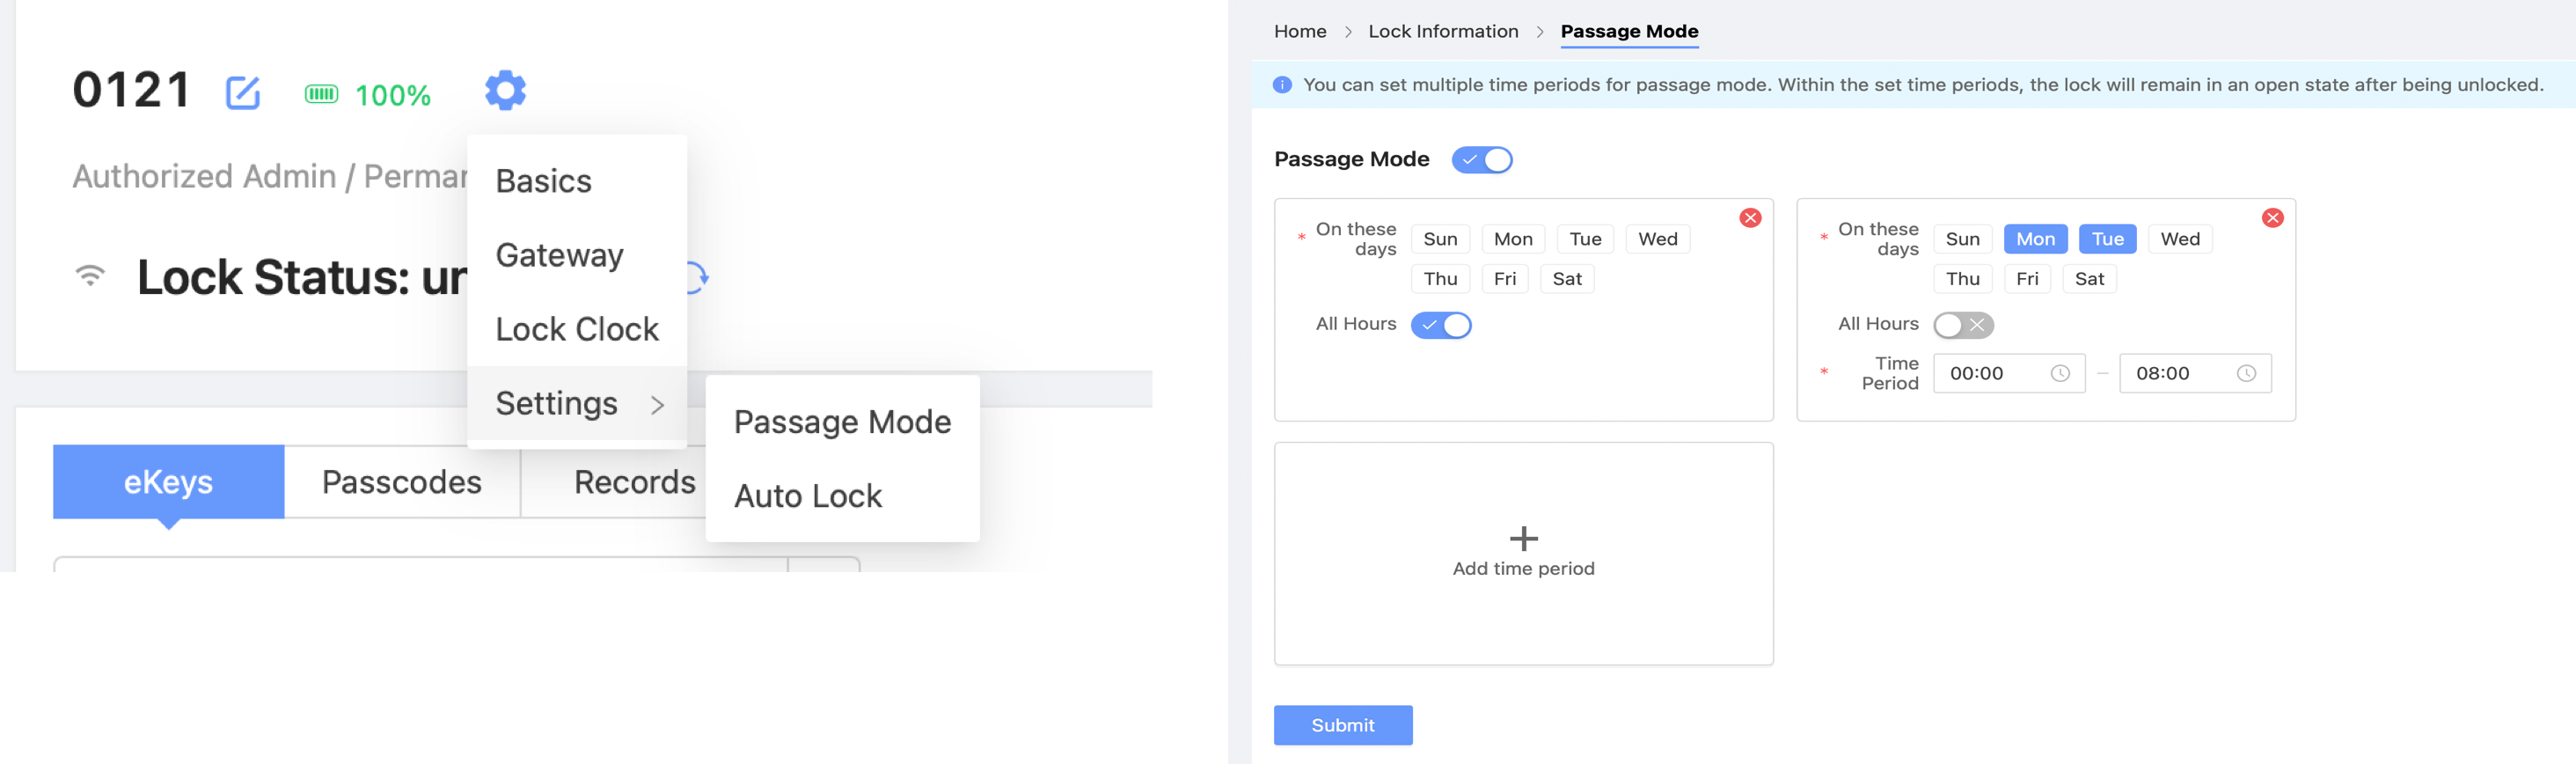
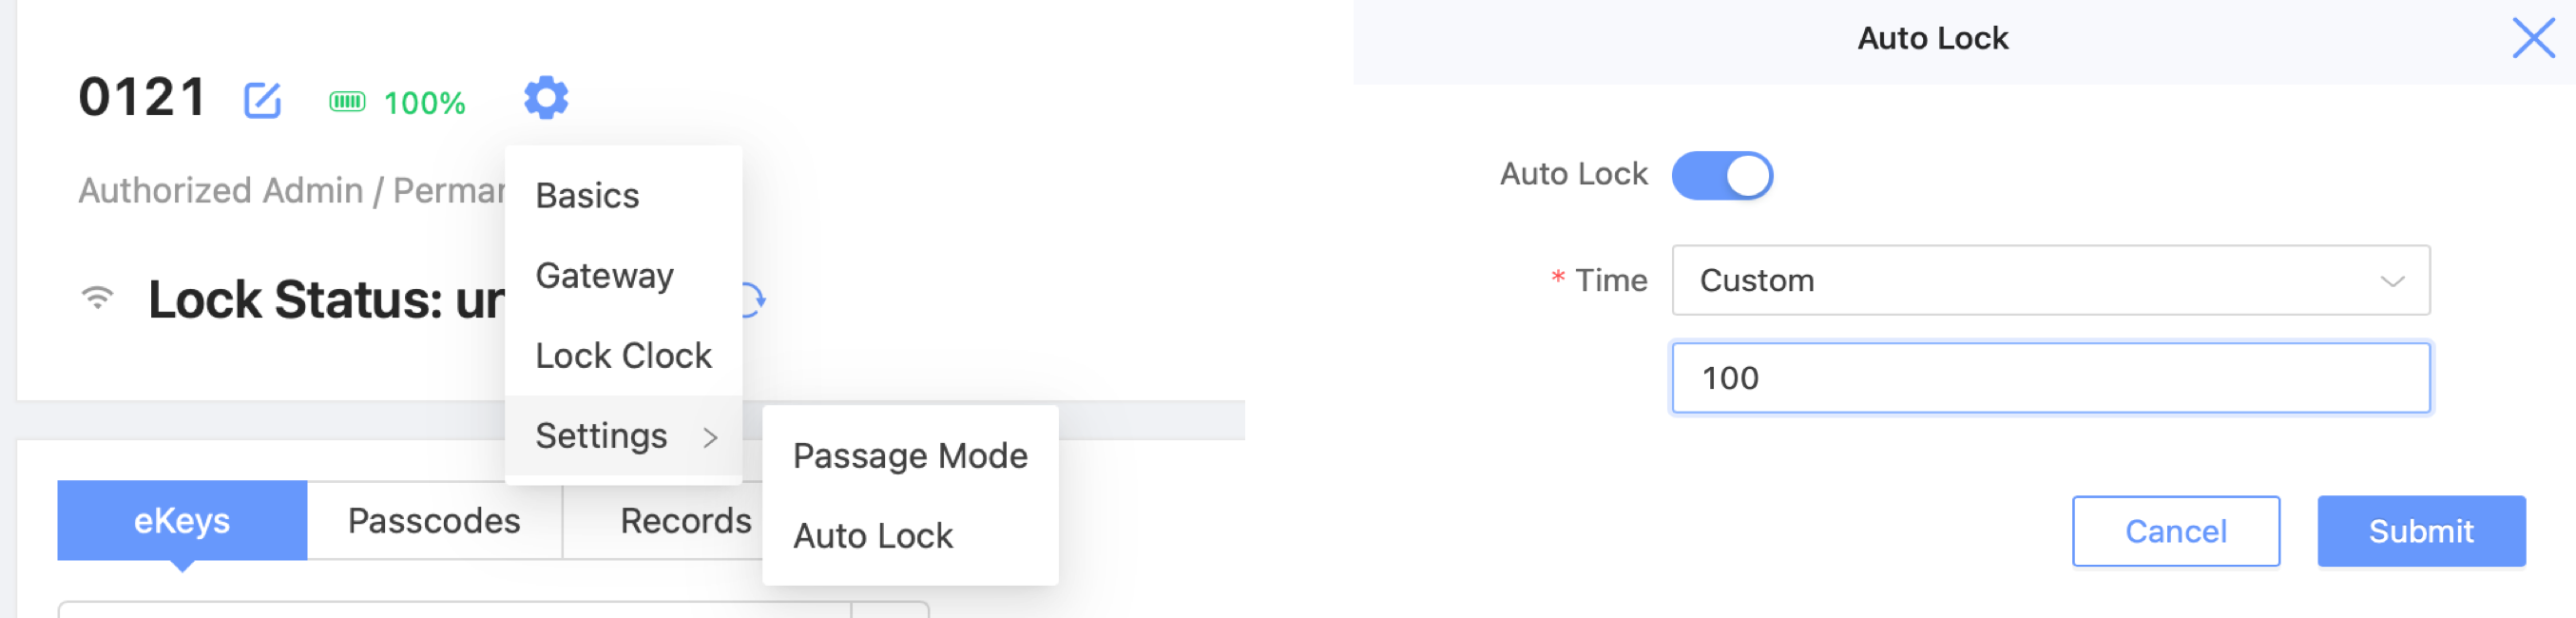
Click "Setting" icon you can see what settings you can do, including Basics, transfer lock,Unlock notification, passage mode and Lock's settings, Lock's settings includes "Passage mode", "Auto-Lock", and "Two-factor authentication".
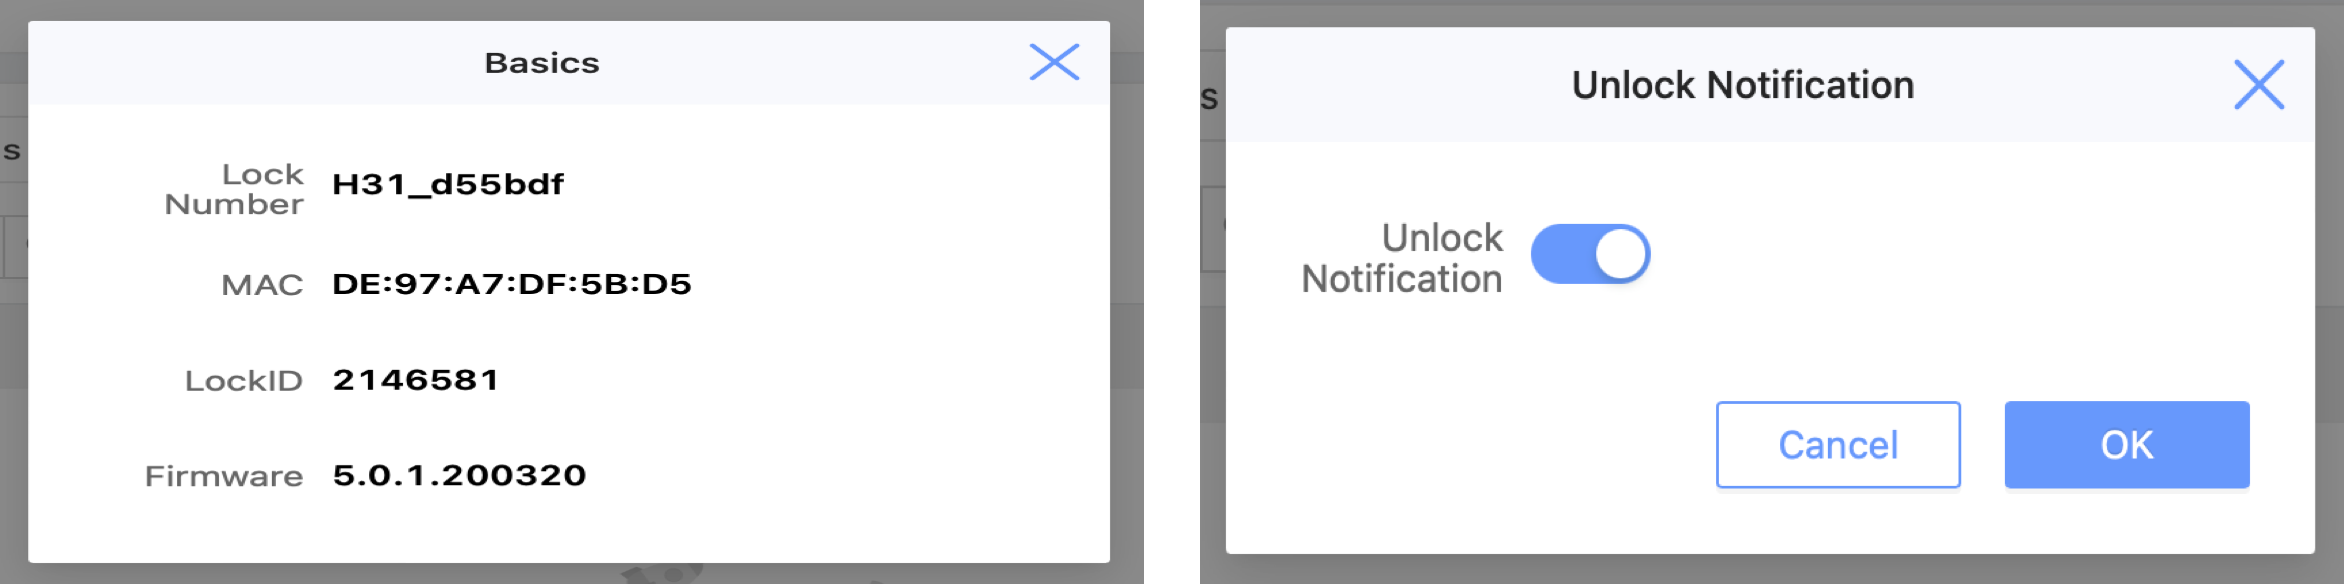
Basics:You can see lock number, MAC, LockID, and firmware version.
Unlock Notification:With this optio on, the administrator will receive notification when someone open door.Note: Except for the ekey, all other door opening methods require the gateway to push notification. Opening the lock using the button on the lock panel or by the administrator will not receive notifications.
- Transfer Lock:Select locks you want to transfer.

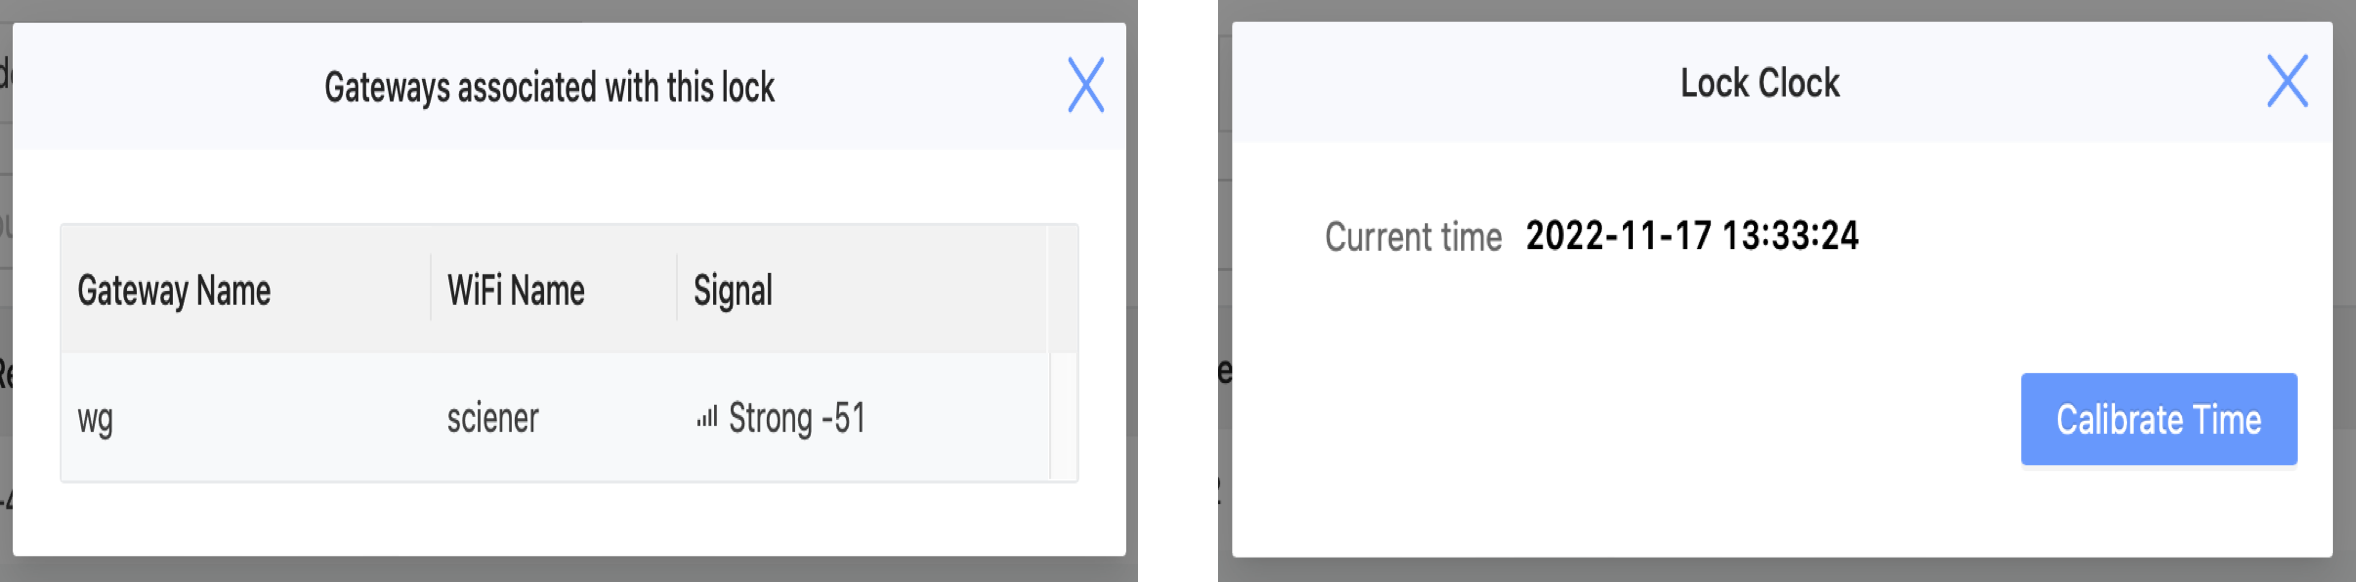
Gateway:See gateways connected to this lock, including name, wifi, and signal.
Lock Clock:Check and "Calibrate" the time in the lock.
- Passage Mode:Set date and time for the passage mode. The lock will stay unlock during this period.
- Auto Lock:The lock will lock automatically after the time.
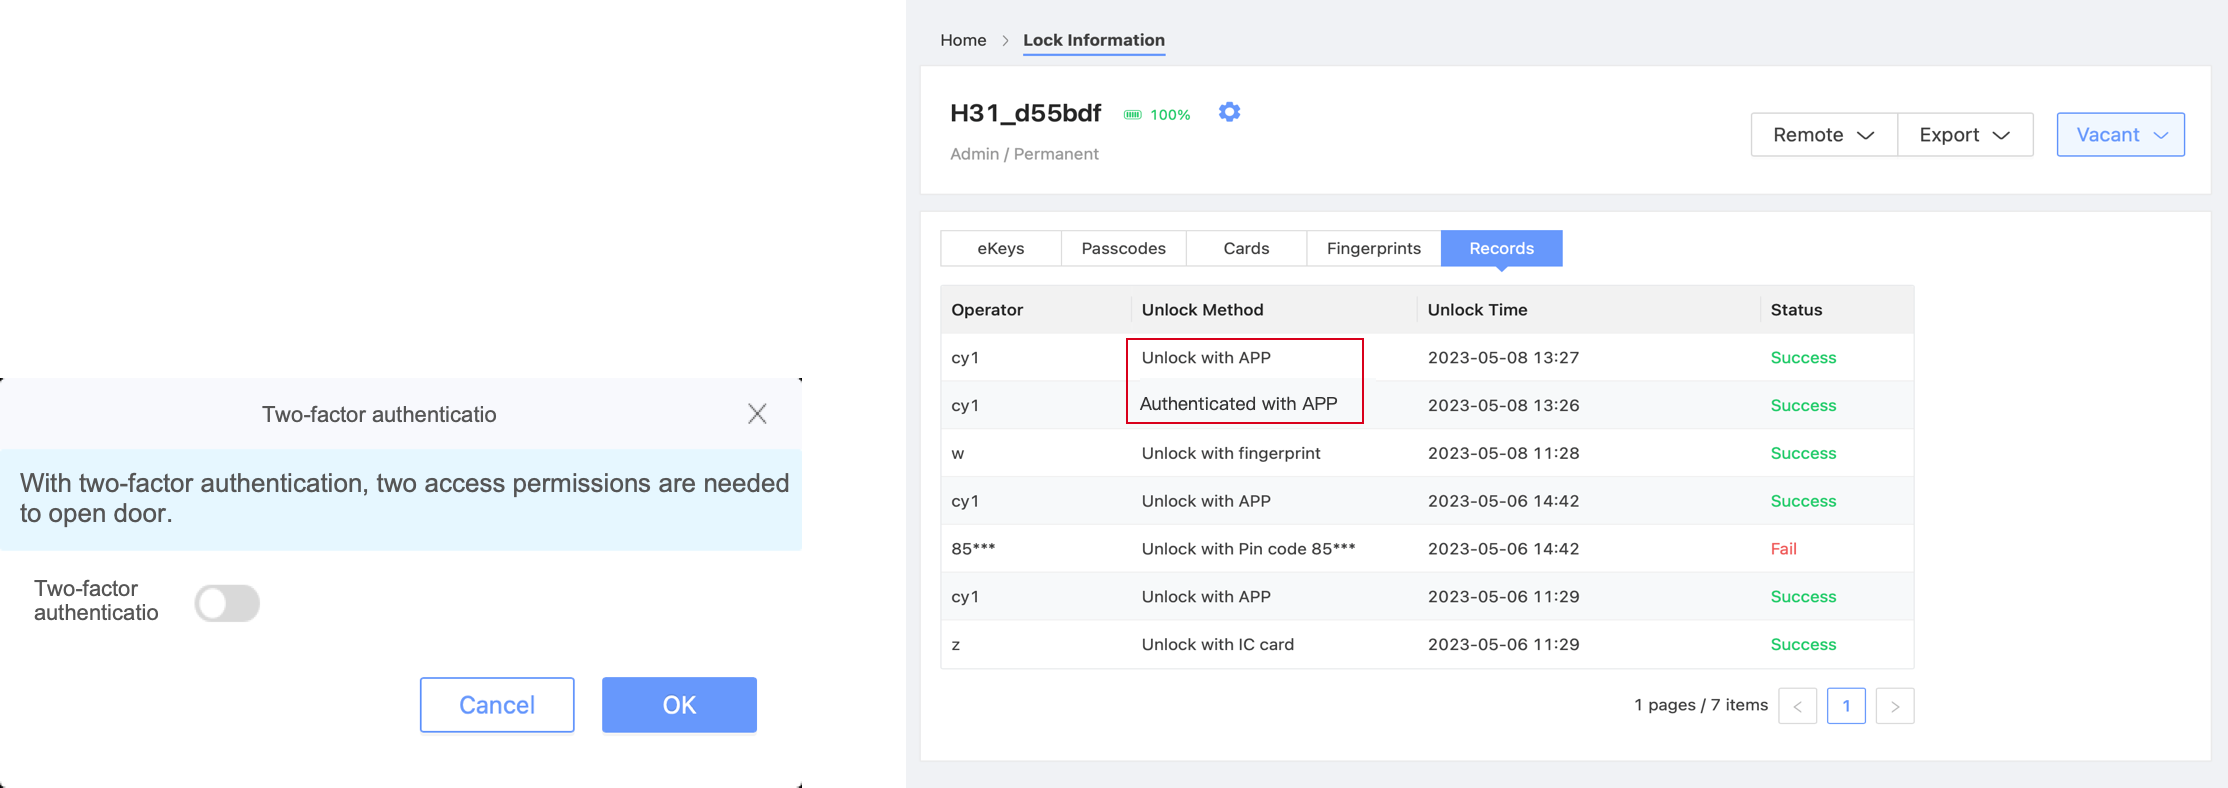
- Two-factor authentication:With two-factor authentication, two access permissions are needed to open door.
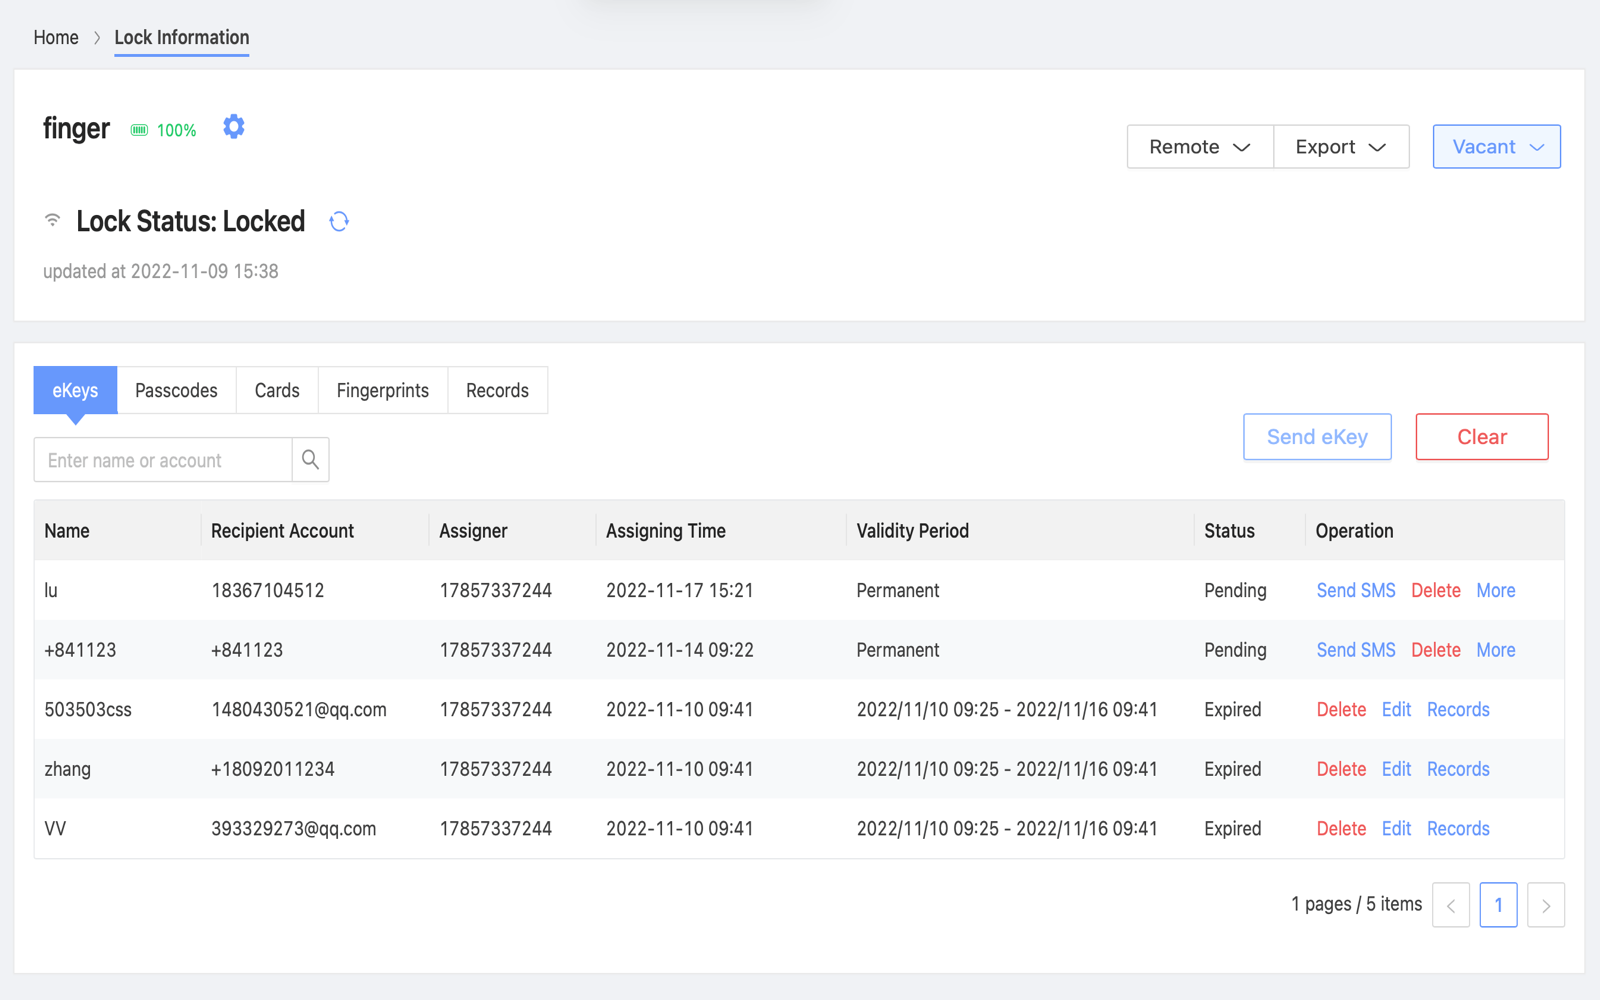
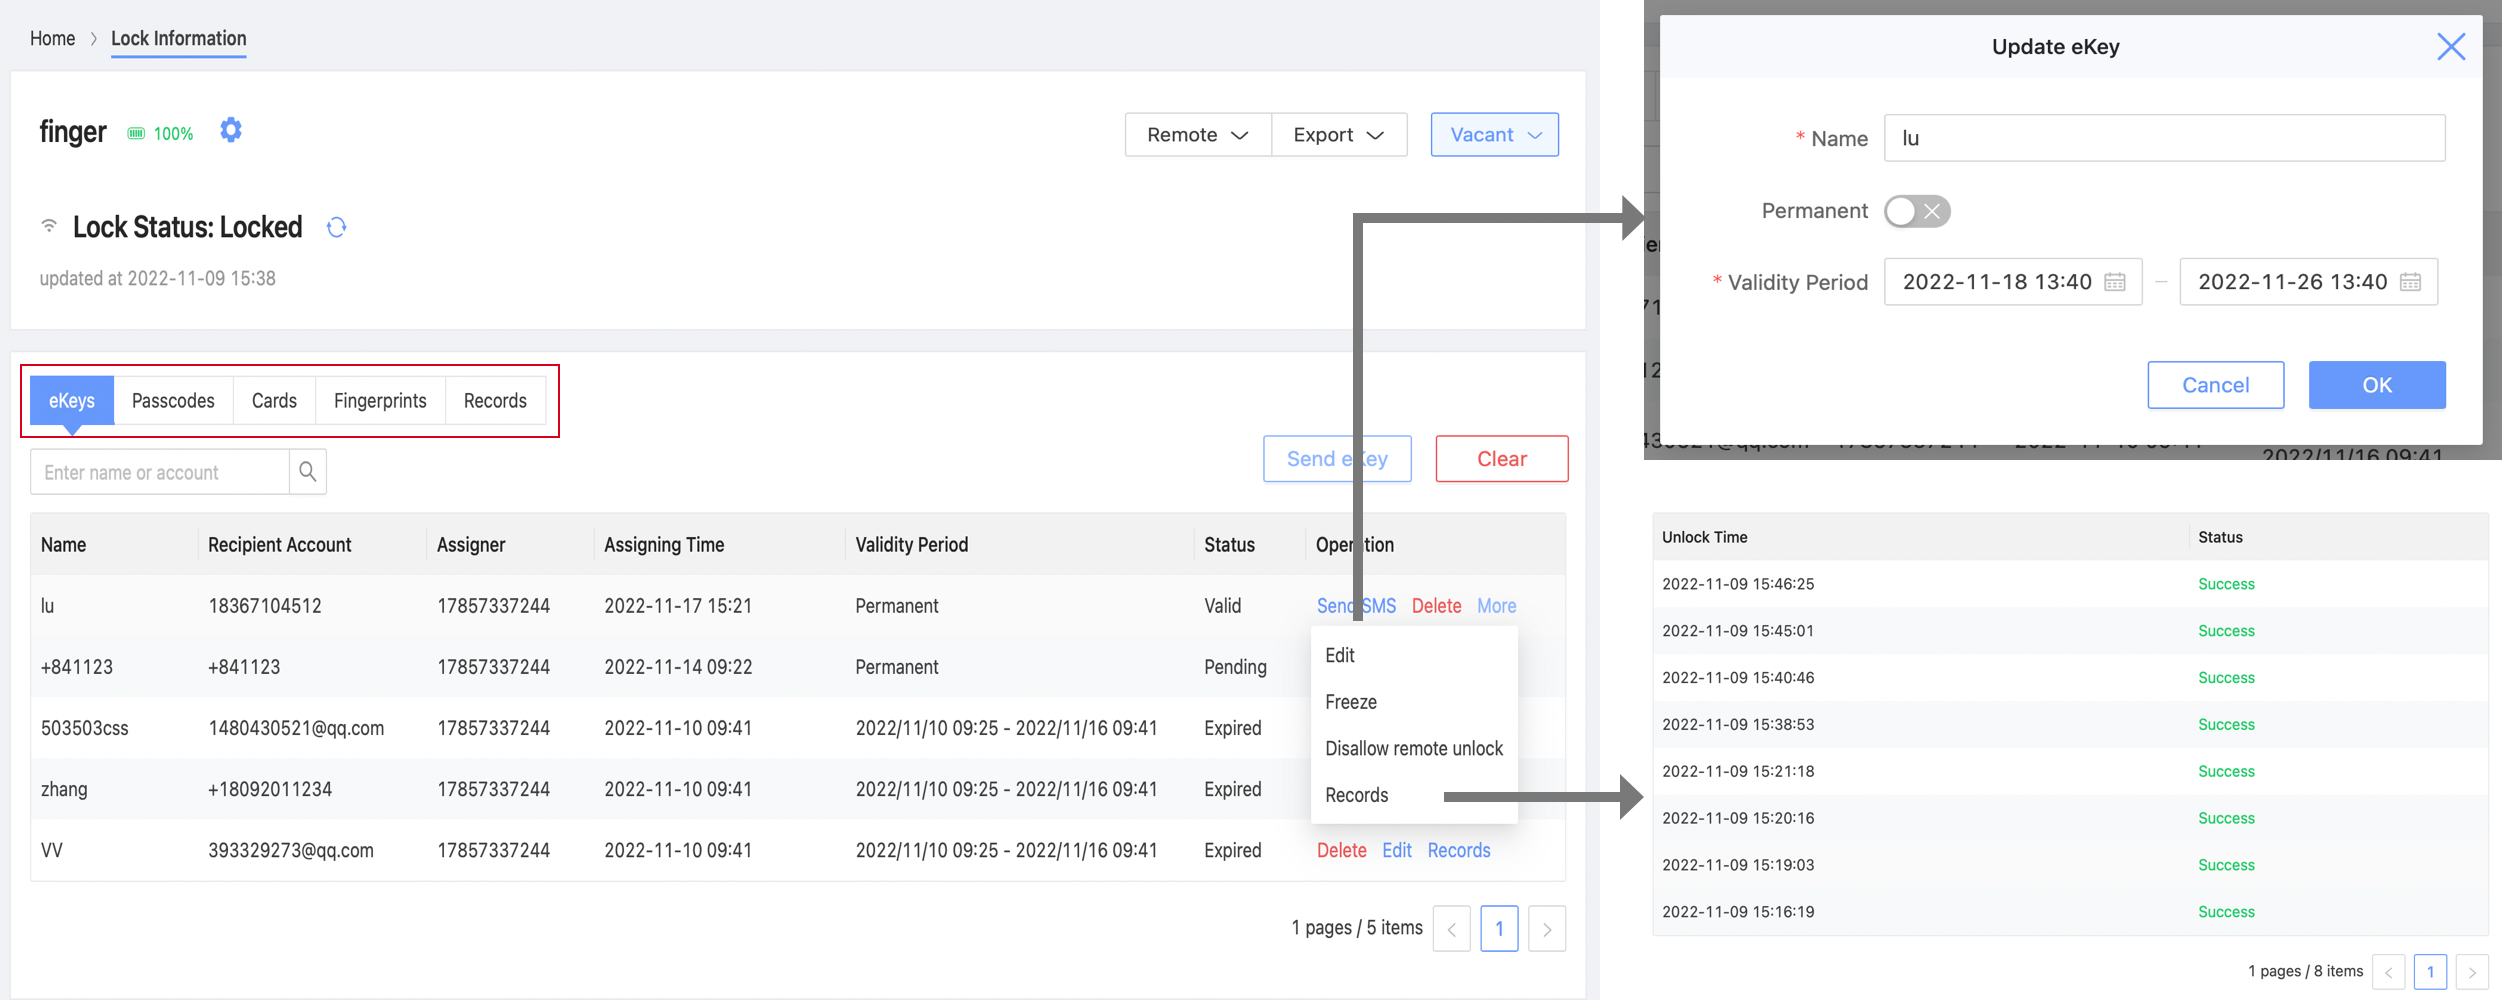
2.Access Permissions
There are various unlock methods, including ekey, passcode, card, fingerprint,Add QR code*,and Add face.
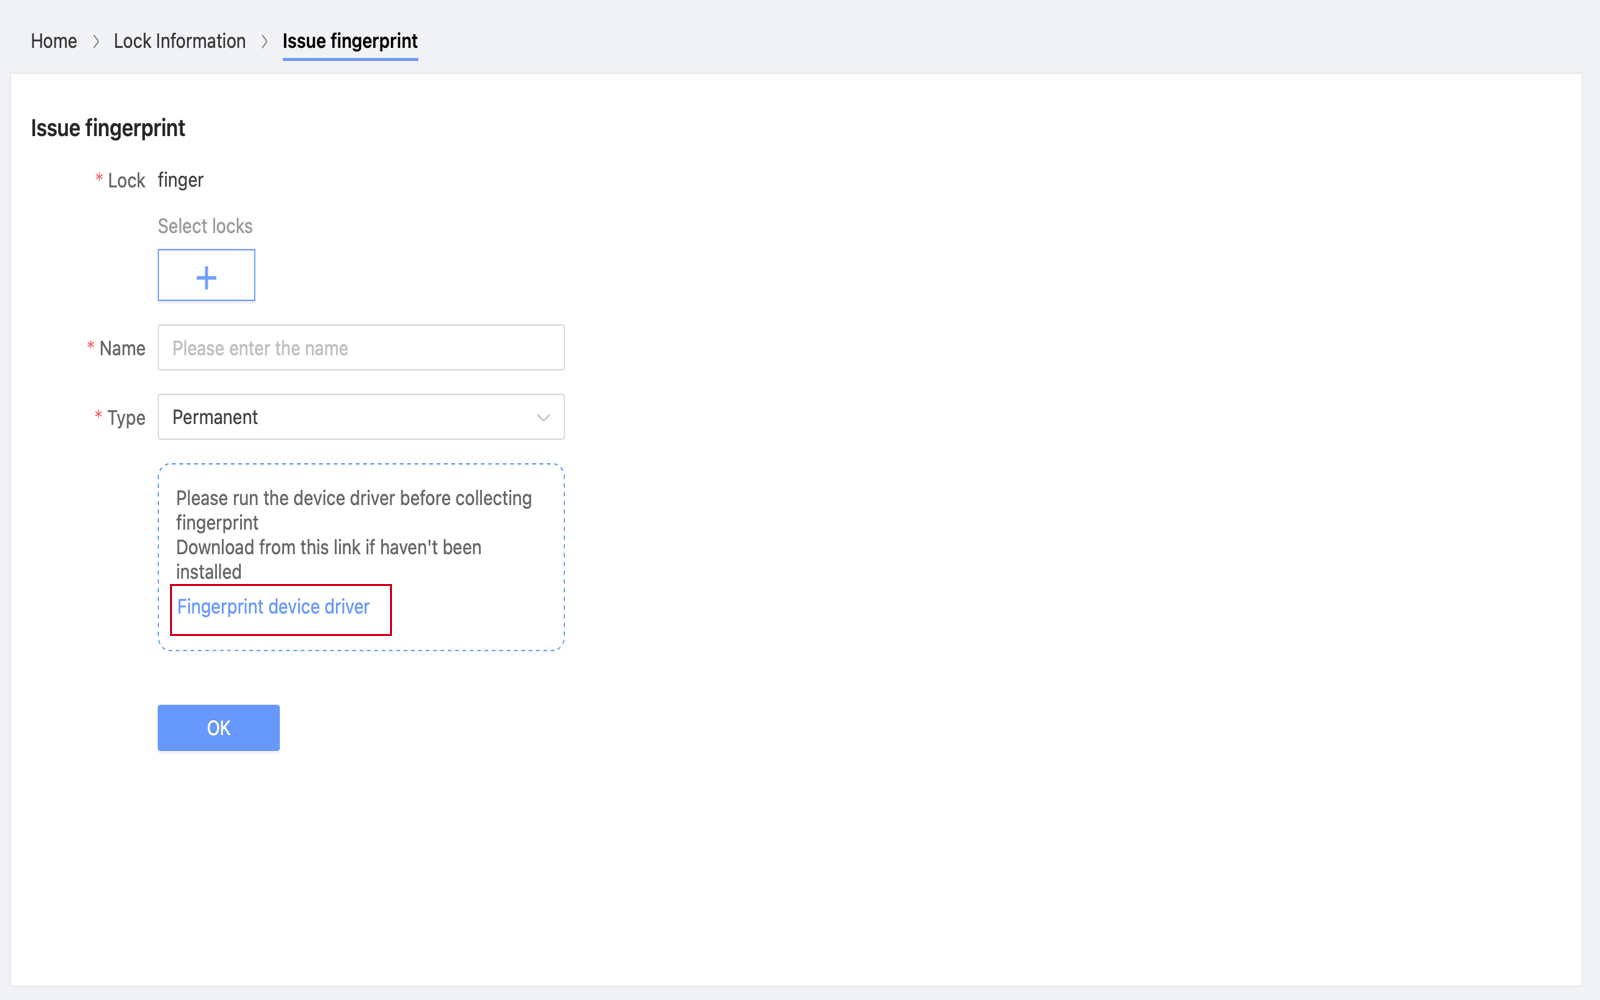
- Issue fingerprint: Click "Issue fingerprint", select locks and set validity period and name, then you can issue the fingerprint to locks.(How to send ekey, send passcode, and issue⇒Home)
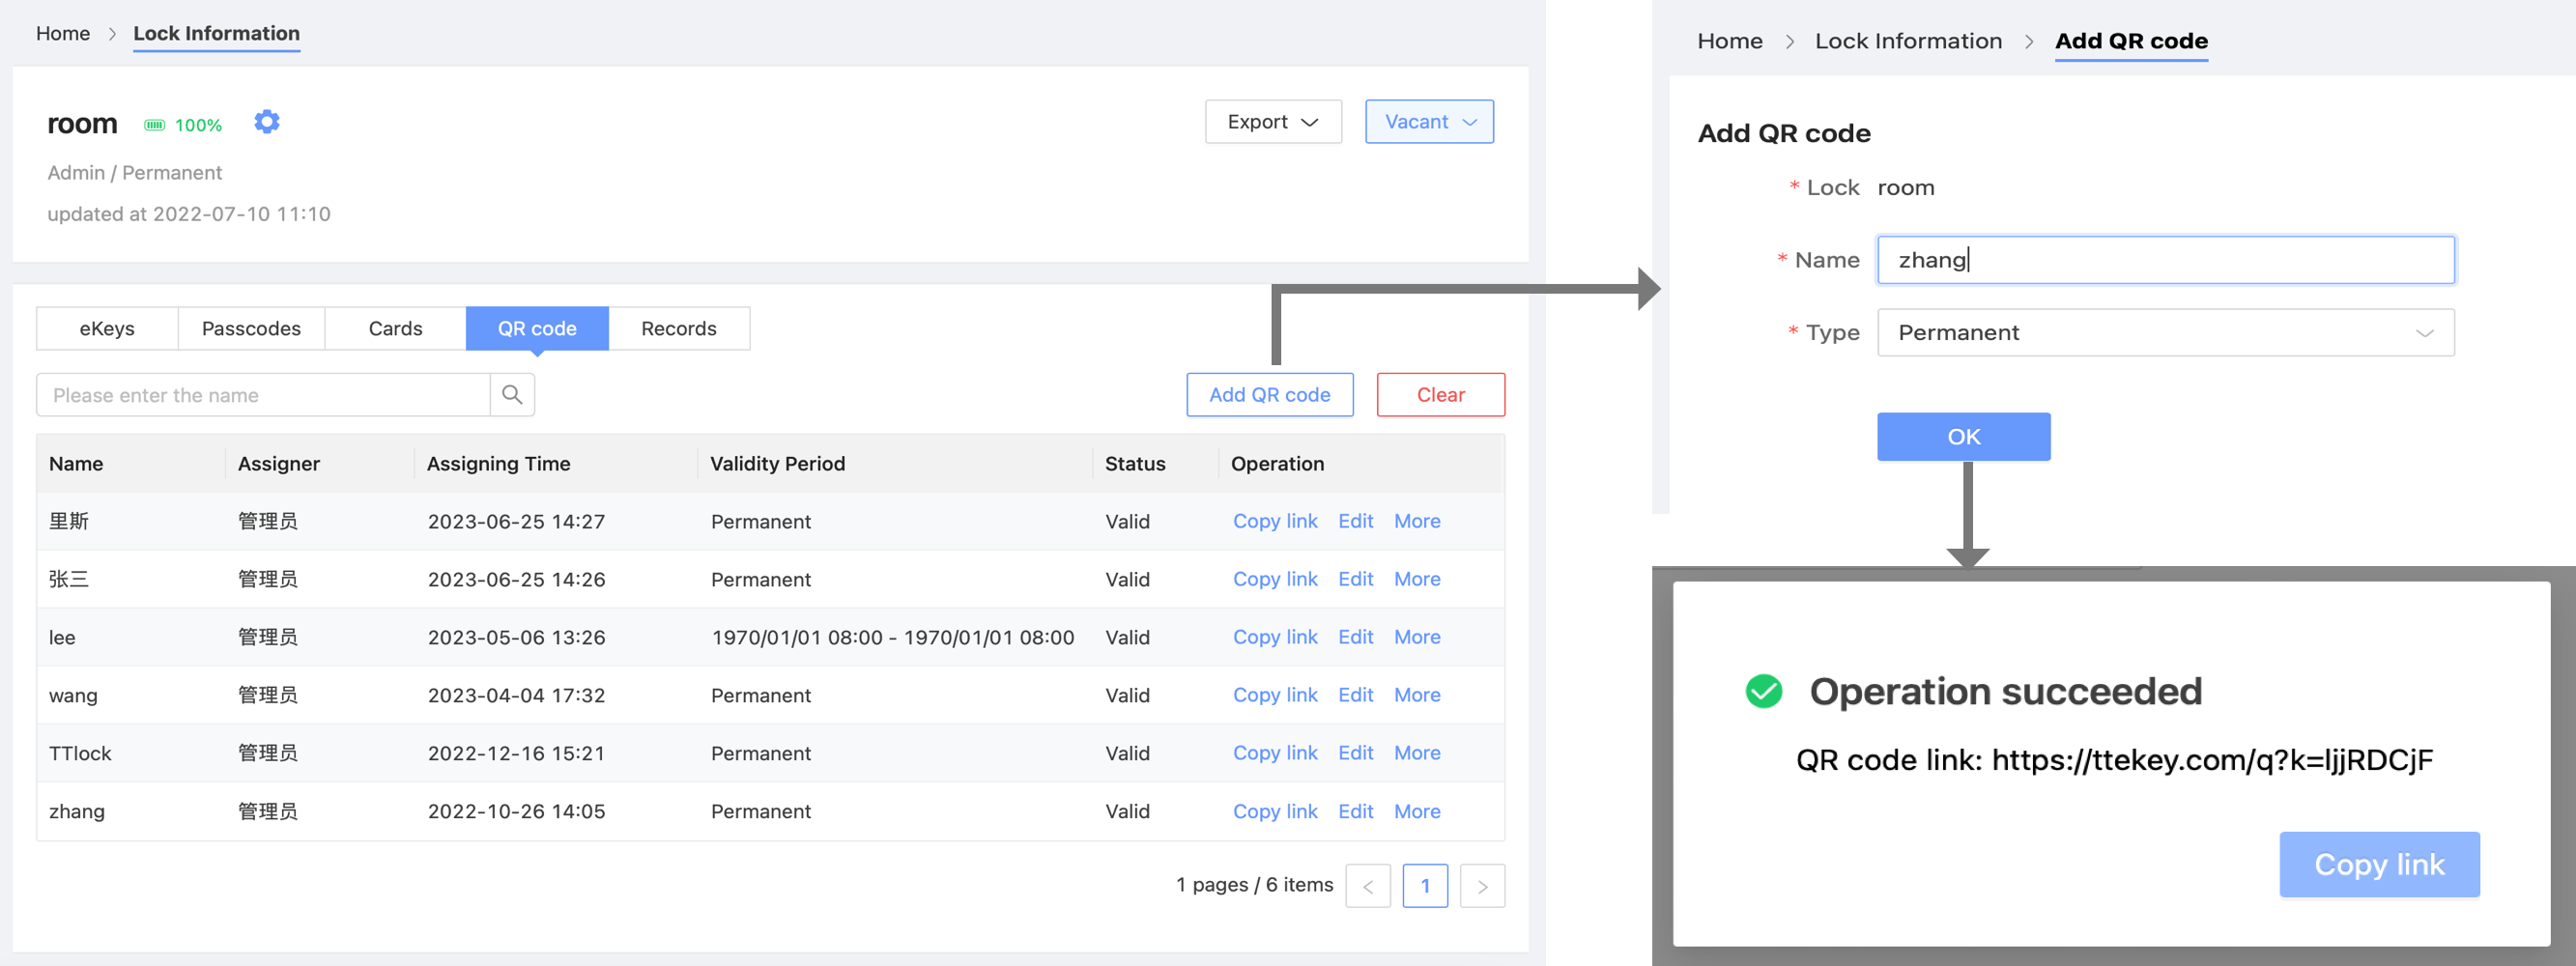
- Add QR code:Click on "Add QR code" and enter the name and type on the page. Copy the link to share the QR code with others.
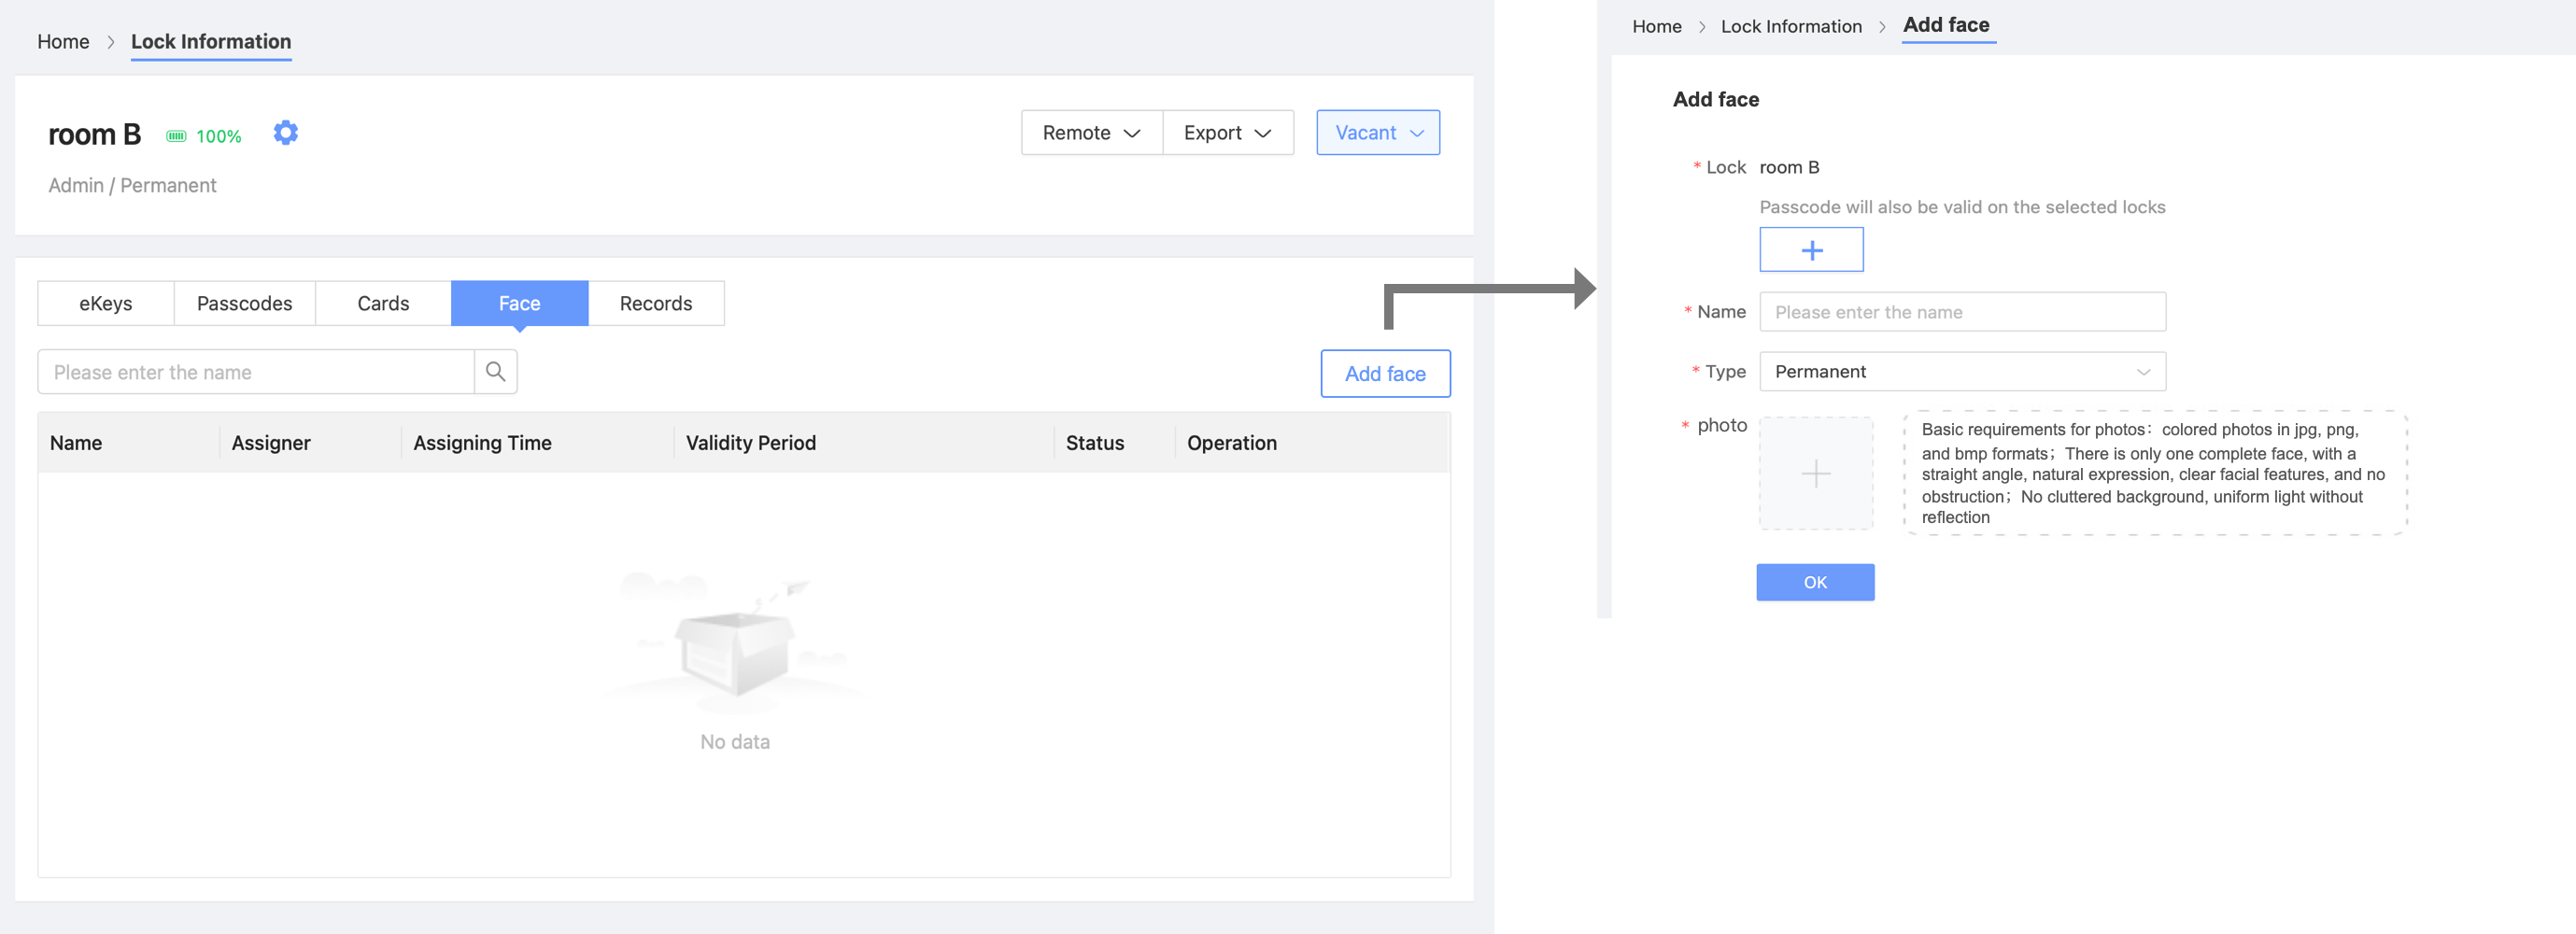
- Add face:Click "Add Face", select the lock and type, enter the name. Upload your photo according to the requirements. Then click "OK" to issue the face to the lock.
Remote Unlock:Once the lock connects to network, you can do remote lock and unlock.
Access permission: You can manage them in the list.
3.Data Exports
You can export records of a selecct period.

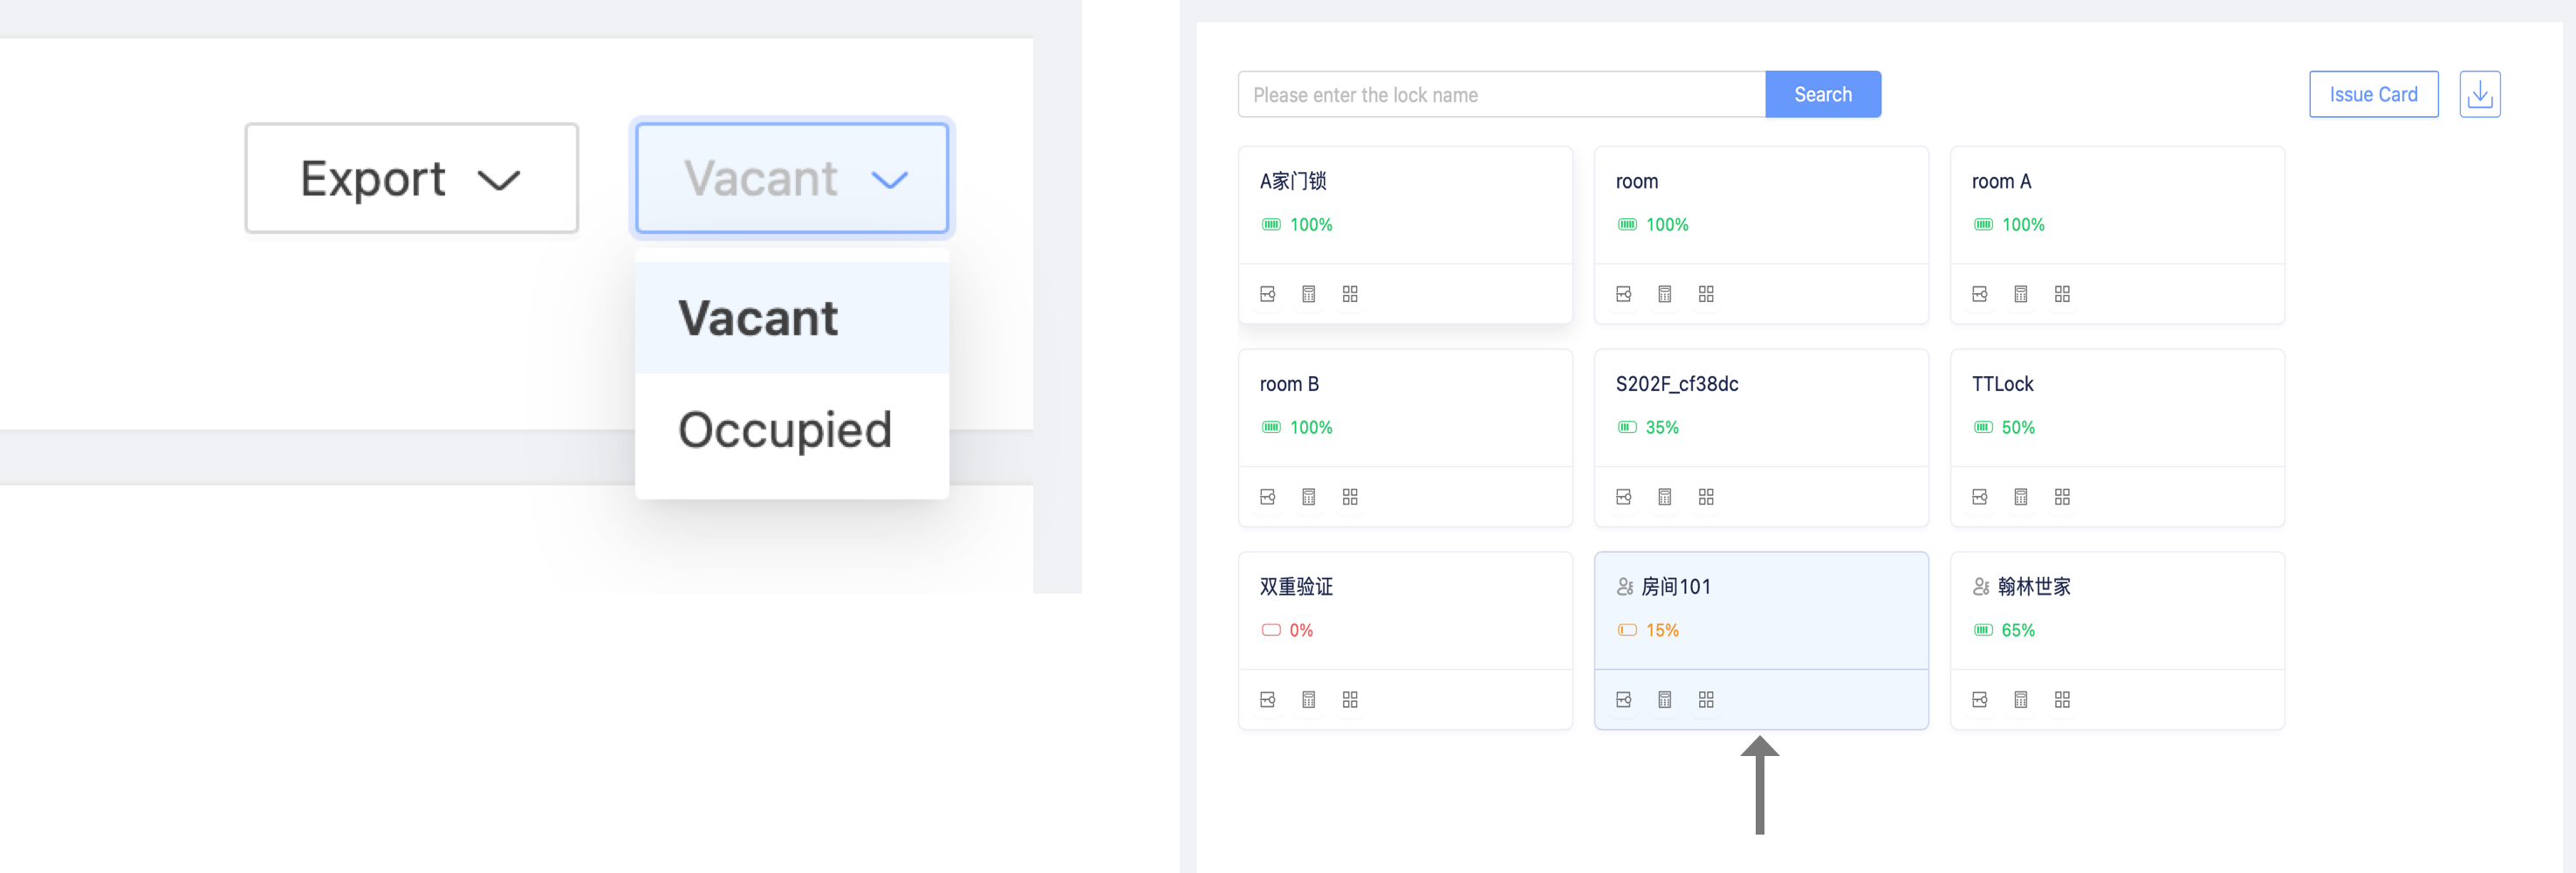
4.Room status
On the web platform, you can also use a quick key to mark the room status and see the current room status on the upper right corner, which allows for quick switching between statuses.