Services
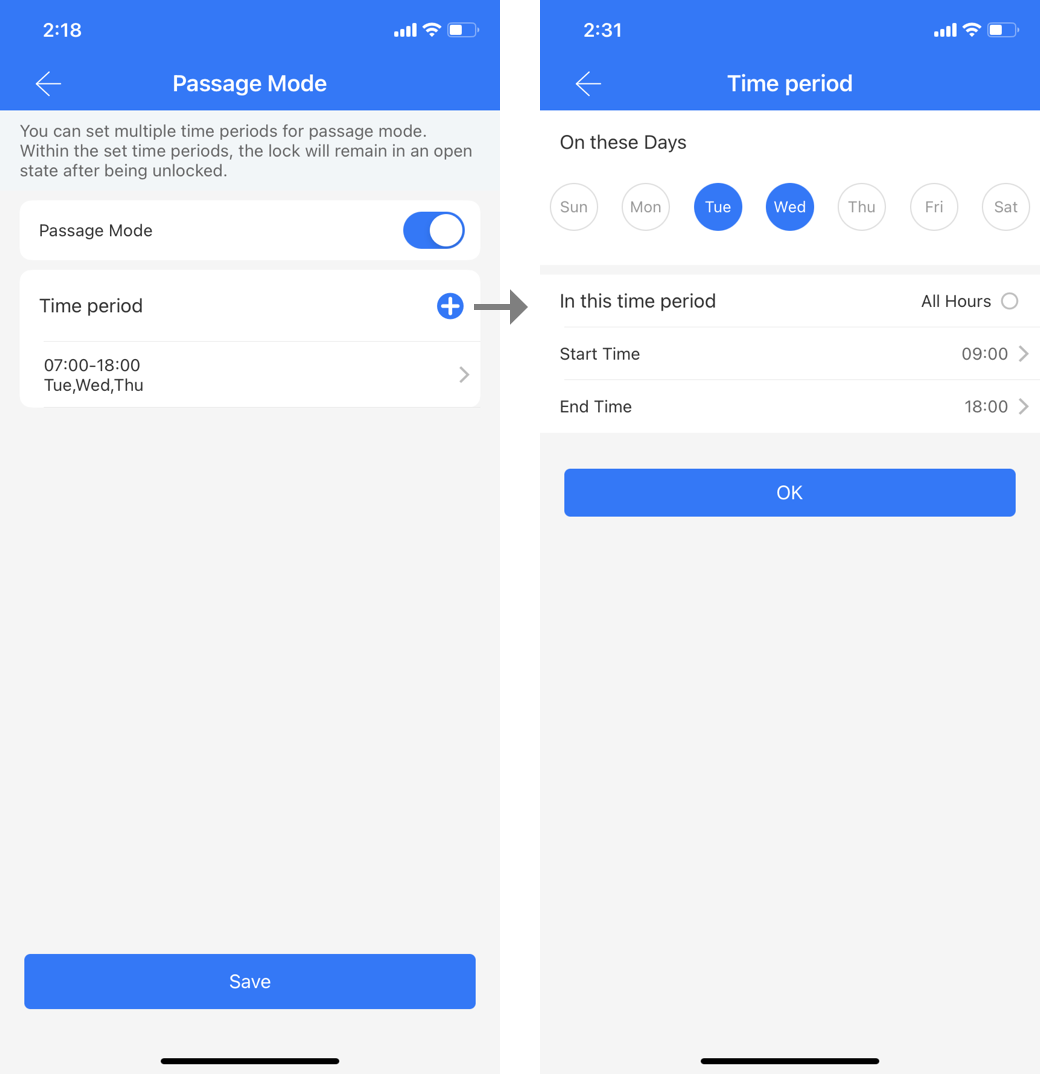
There are also value added functions. You can find "Services" in the App's "settings" menu. It includes SMS, email, and advanced functions.
1.SMS&Email
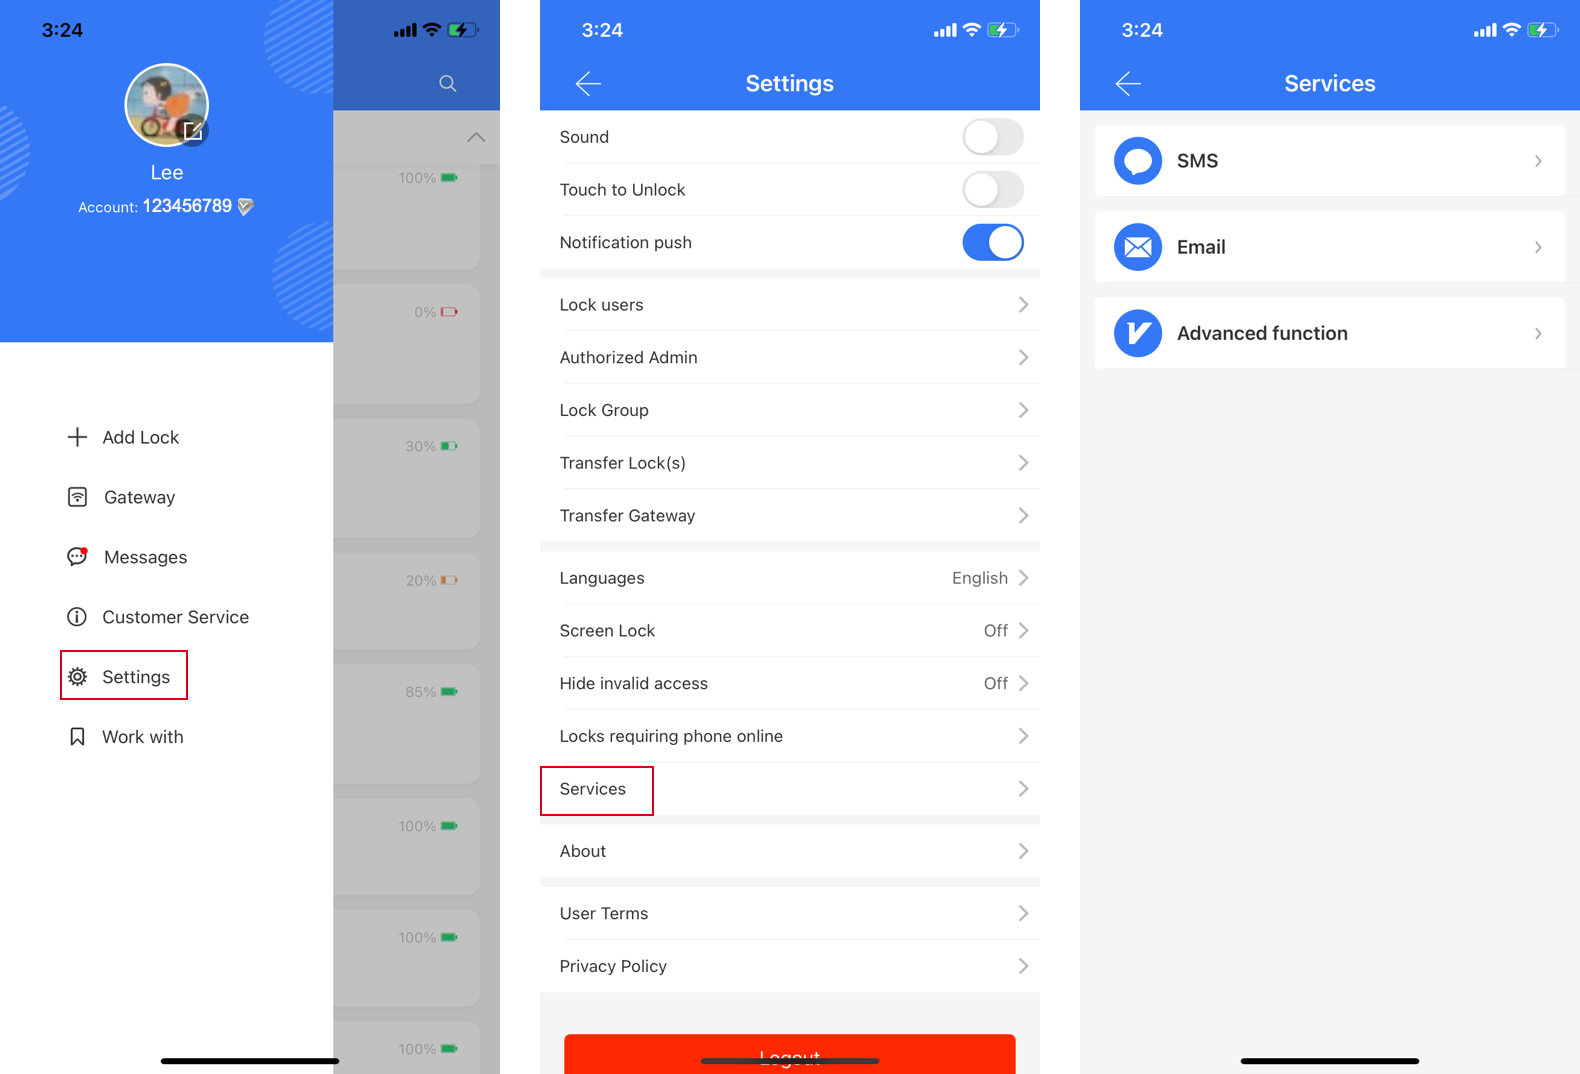
functions:You can send information of ekey or passcode to someone else via SMS or email.
Steps(Take SMS for example): After sending the ekey, click "Notify via SMS", choose either System SMS or Personal SMS.
Personal SMS: Send from your phone, and charge from your phone number.
System SMS: Send from the software system. You should buy SMS package first.
*You can also click the copy icon in the bottom right to copy the content and send it to others.
2.Advanced Functions
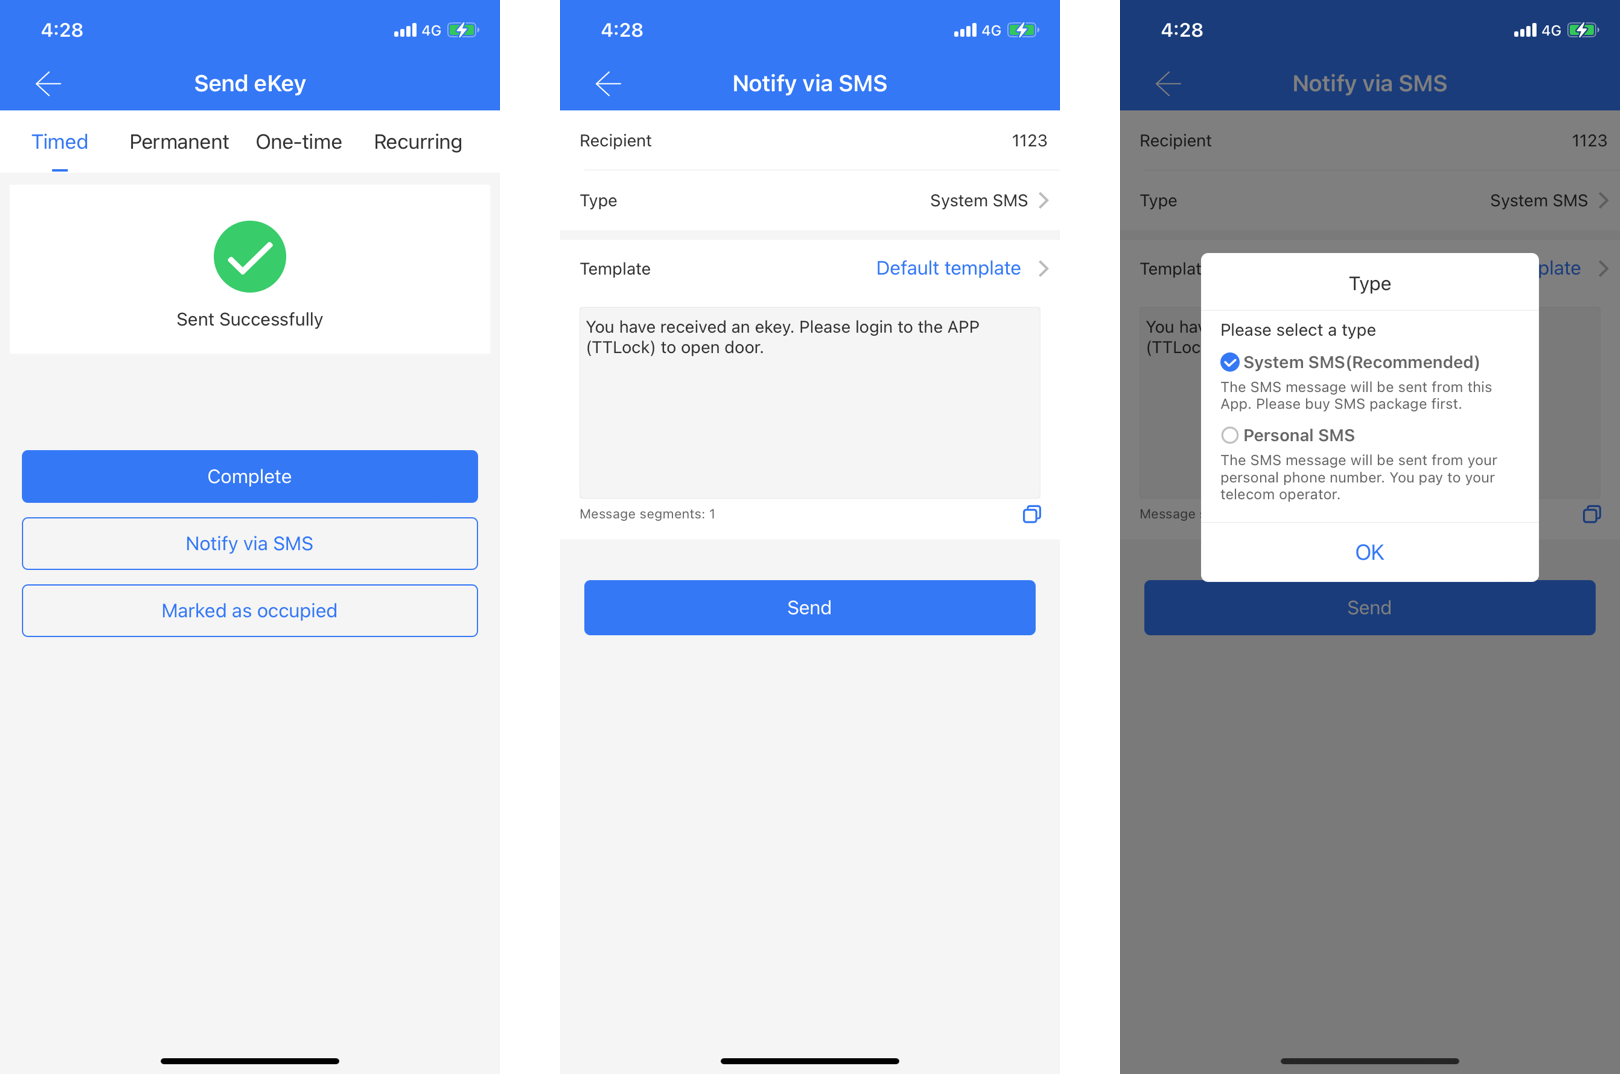
The advanced functions include customization of SMS and email message, add authorized admin in batch, group locks in batch, send multiple ekeys,Room status,Card encoder,Scenario reminder,Unlock all and Passage Mode.
Alternatively, click on the icon behind the account in the app's menu to access the "Advanced Function" page. If you are unfamiliar with the advanced function, you can click on "View details" to see relevant information.
Customization of SMS and Email Message
functions:Customise the SMS and email message.
Steps(Take ①SMS for example):
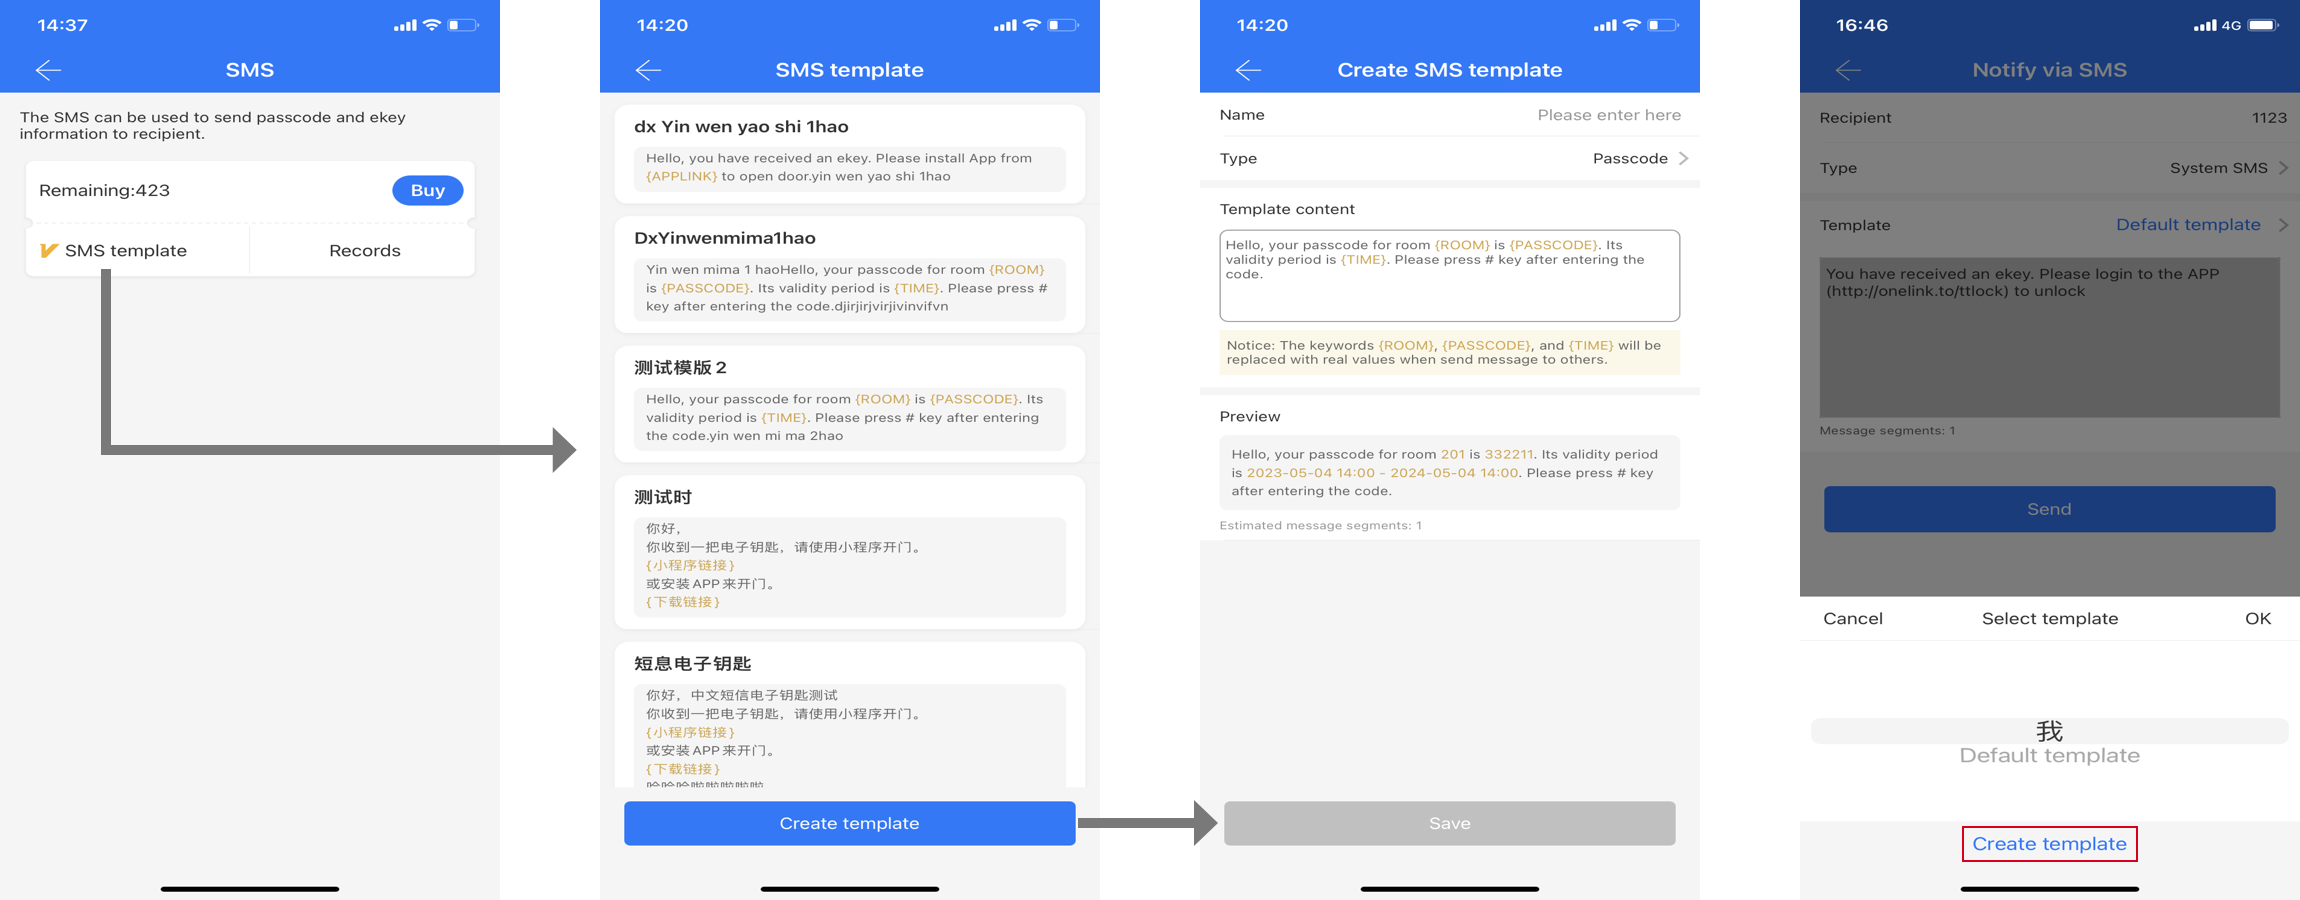
①.Find the "SMS template" at App settings -> Services -> SMS menu. You can view and create your templates here.
②.Click "Create template" button at the bottom to create message template for ekey and passcode.
③.Then you can select the template to send the ekey or passcode message.
Add Authorized Admin
functions:Authorize someone as the administrator of selected multiple locks.
Steps:
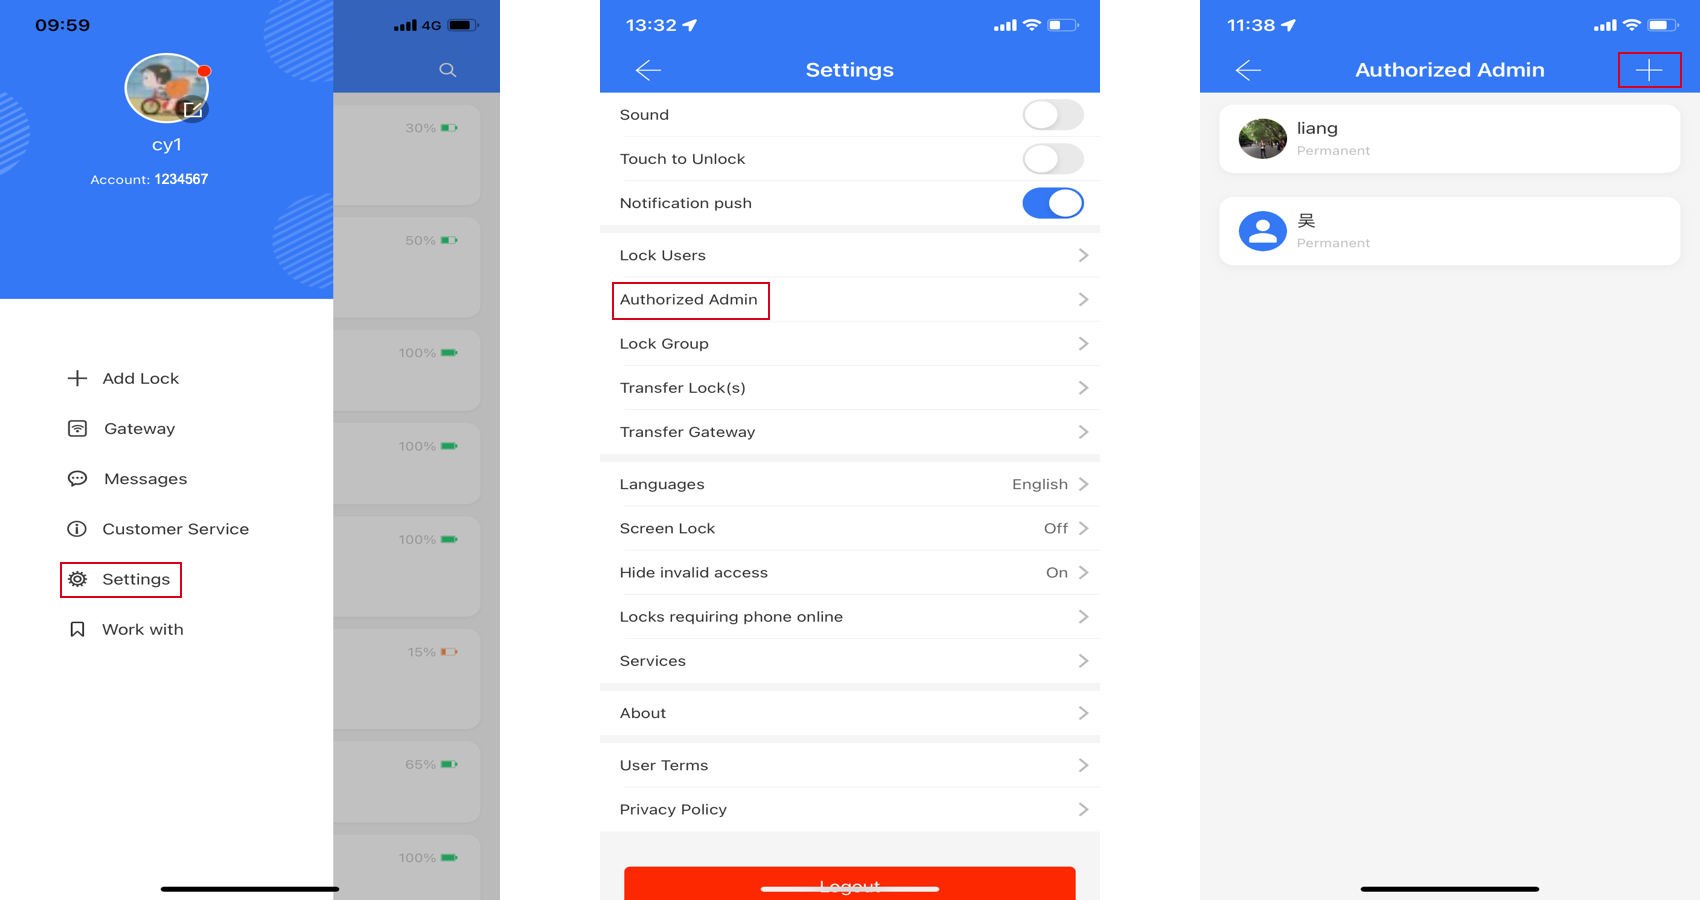
①.Find the "Authorized Admin" in the App "settings" menu. You will see current authorized administrators.
②.Click the "+" icon at the top right to create a new admin.
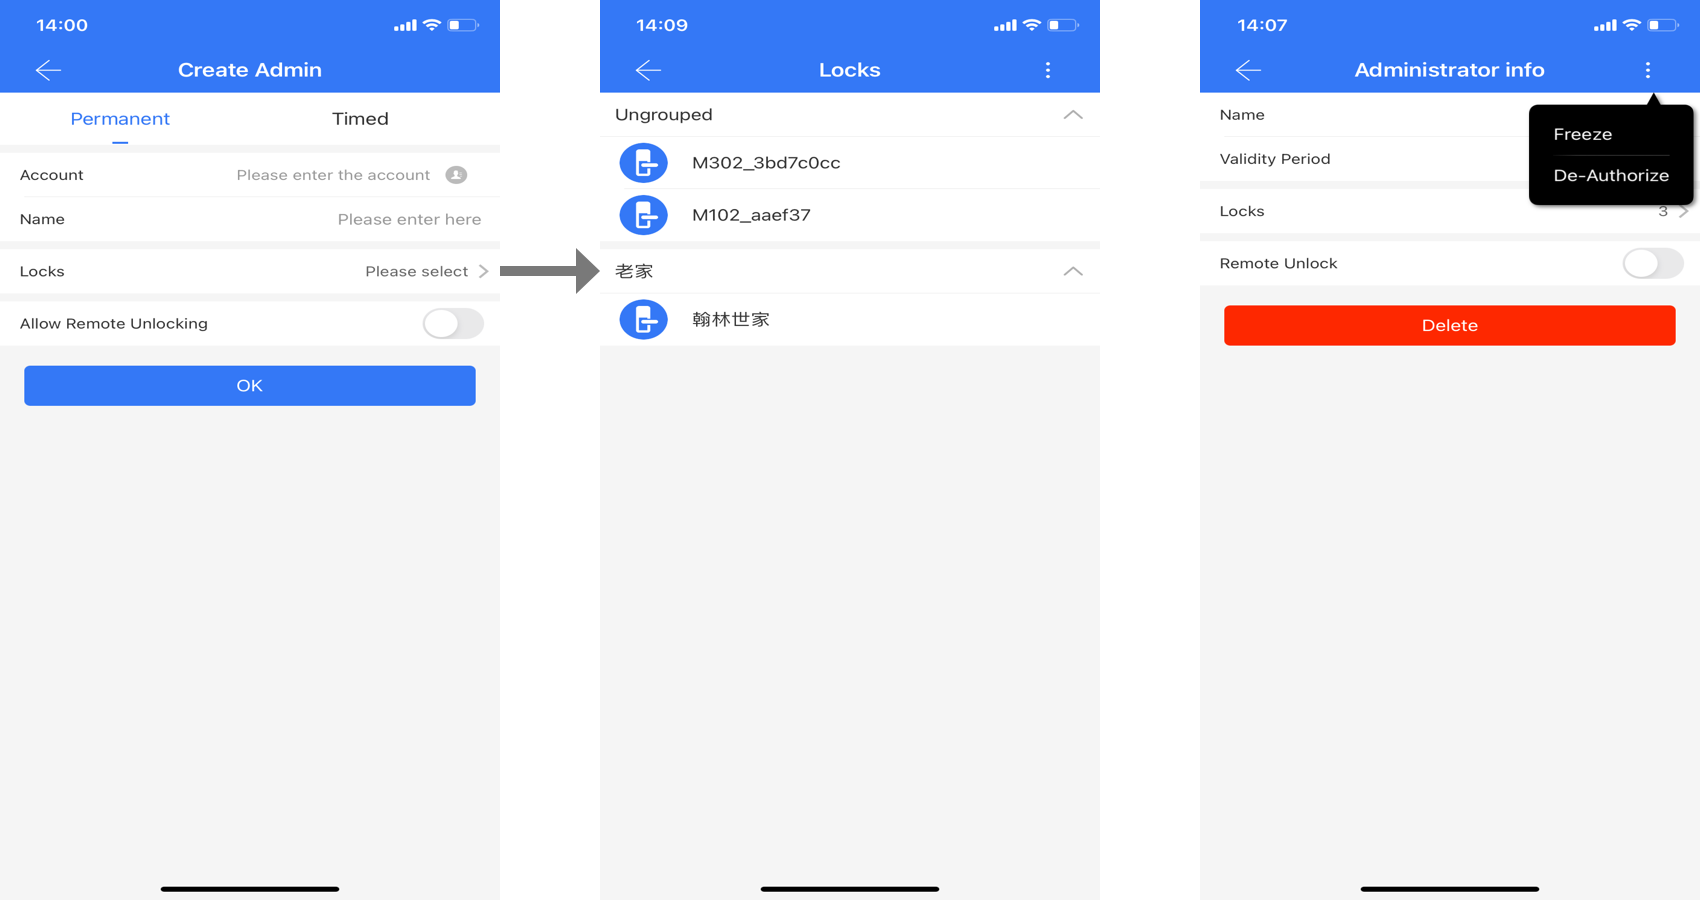
③.In the authorized admin's detail page, you can freeze or de-authorize him, change the validity period, or change locks.
Lock Group
functions:Make the management easier when there are lots of locks.
Steps:
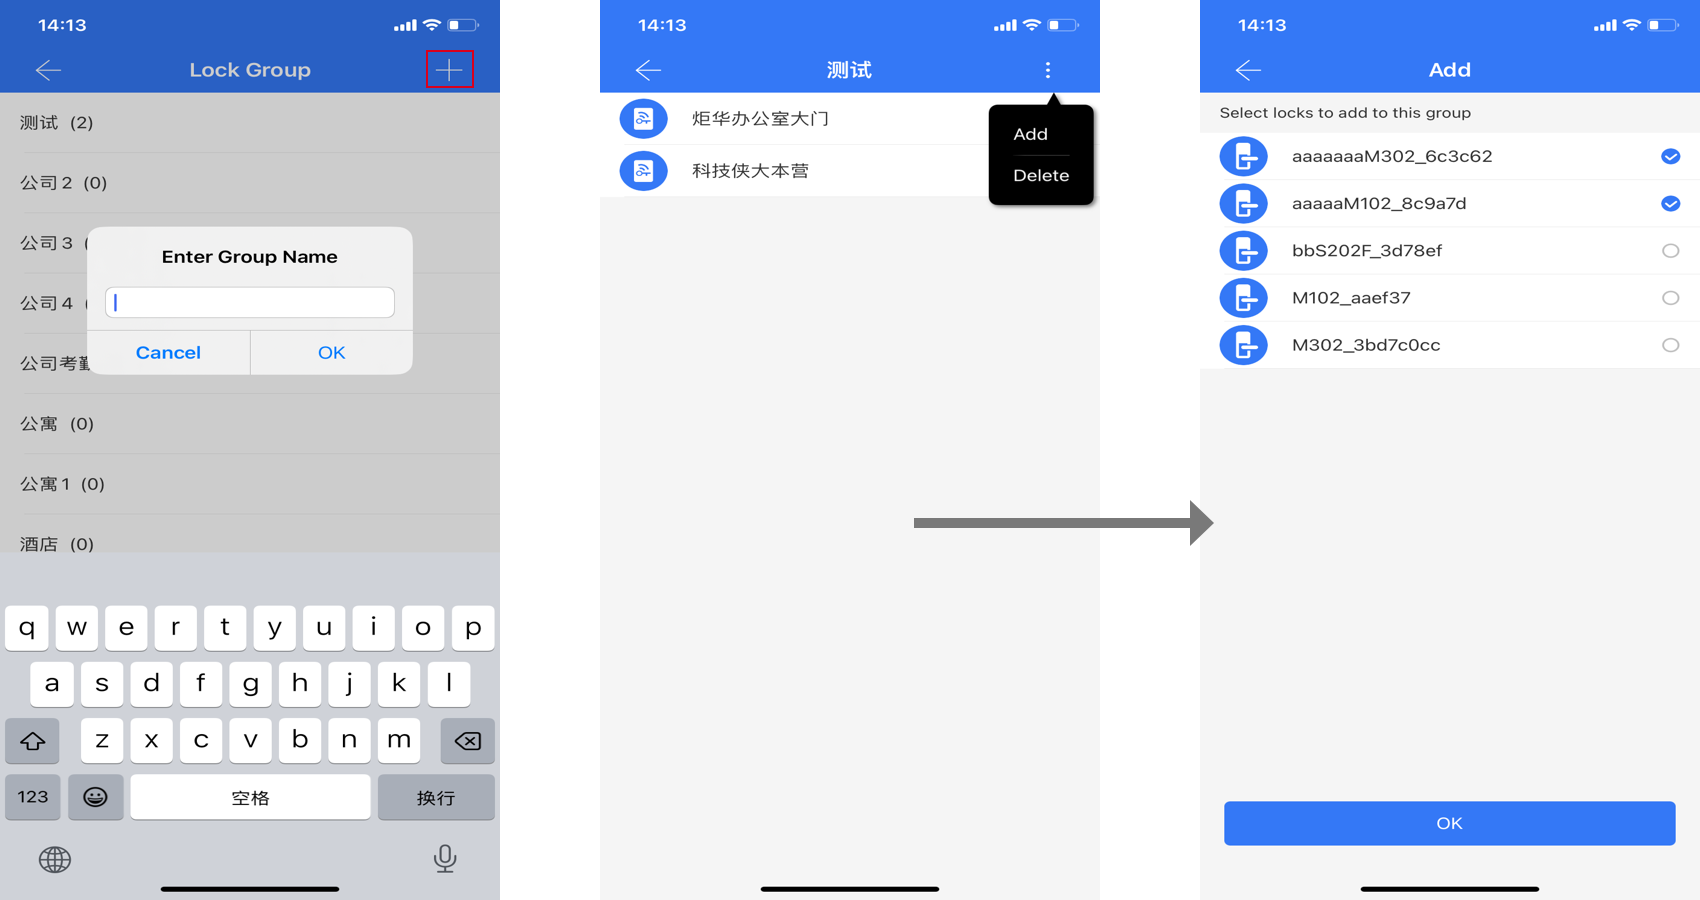
①.Find "Lock Group" in the App settings menu. You will see current groups.
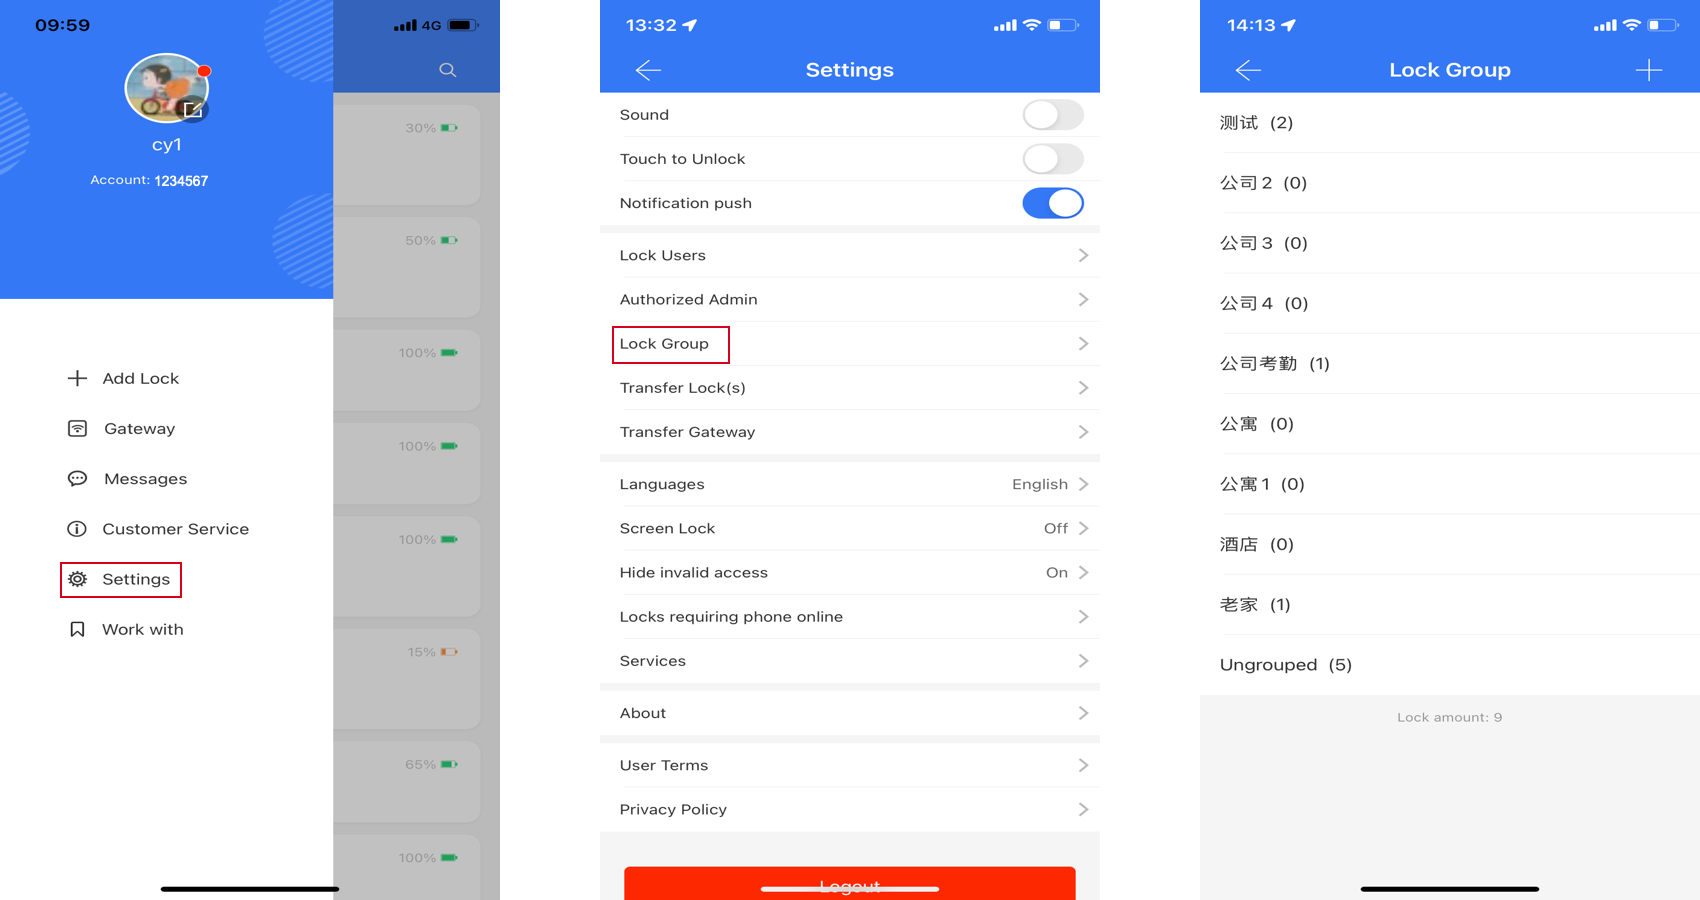
②.Click the "+" icon at the top right to create a new group.
③.Click the new created group, then you can "add" locks to it.
Send Multiple Ekeys
functions:Send ekeys to multiple users.
Steps:
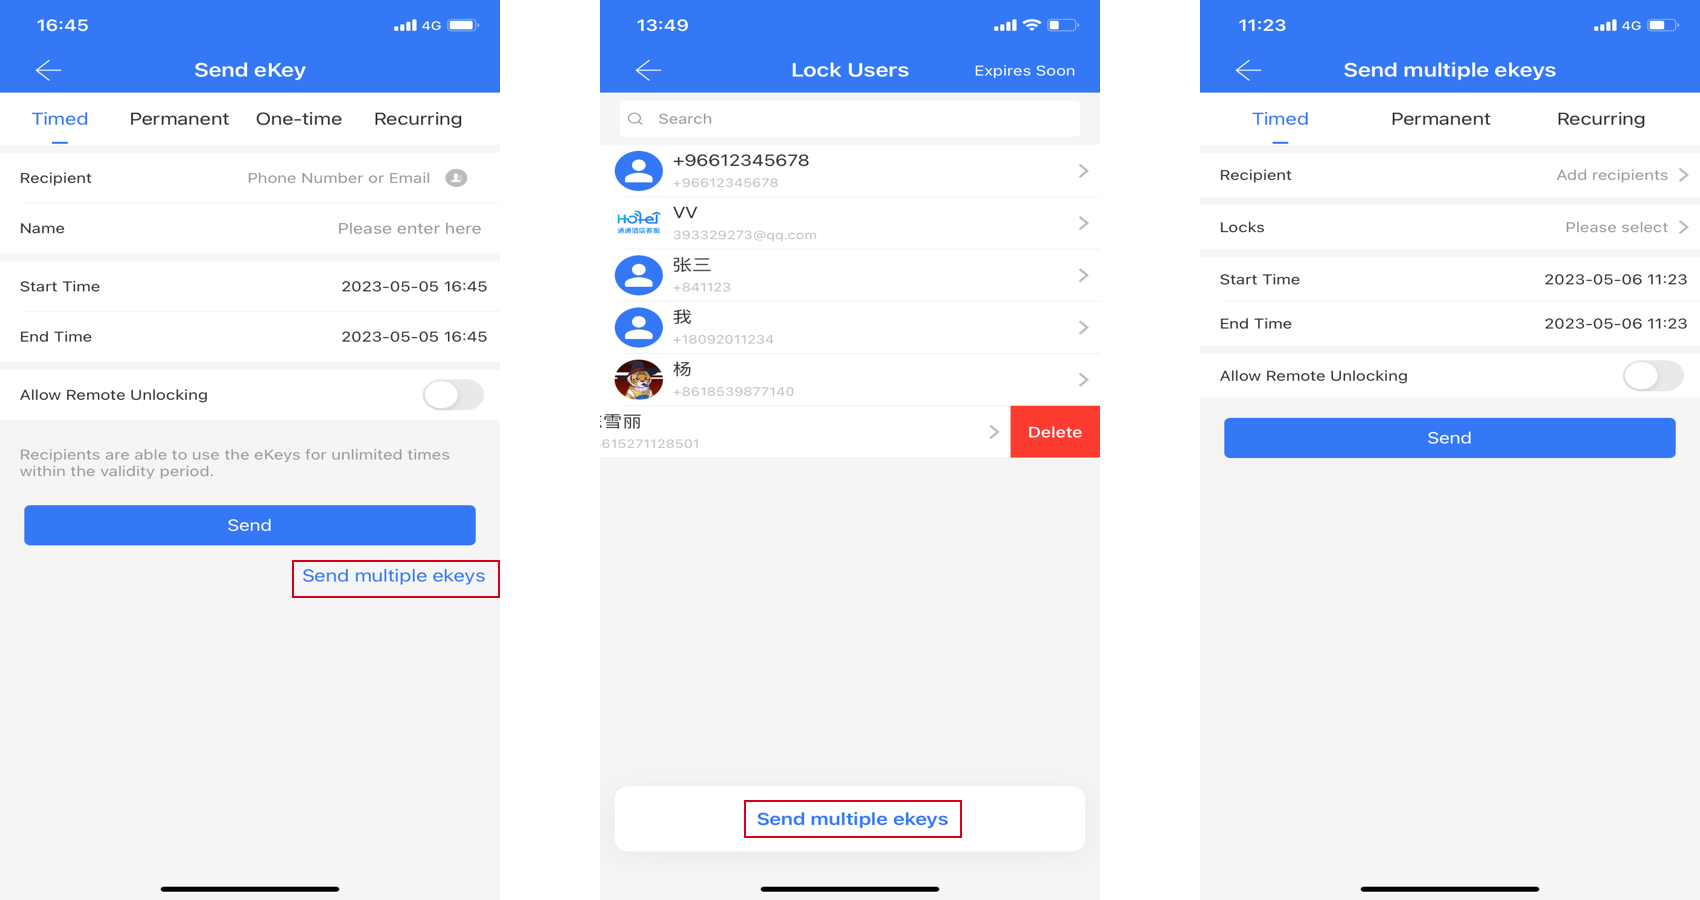
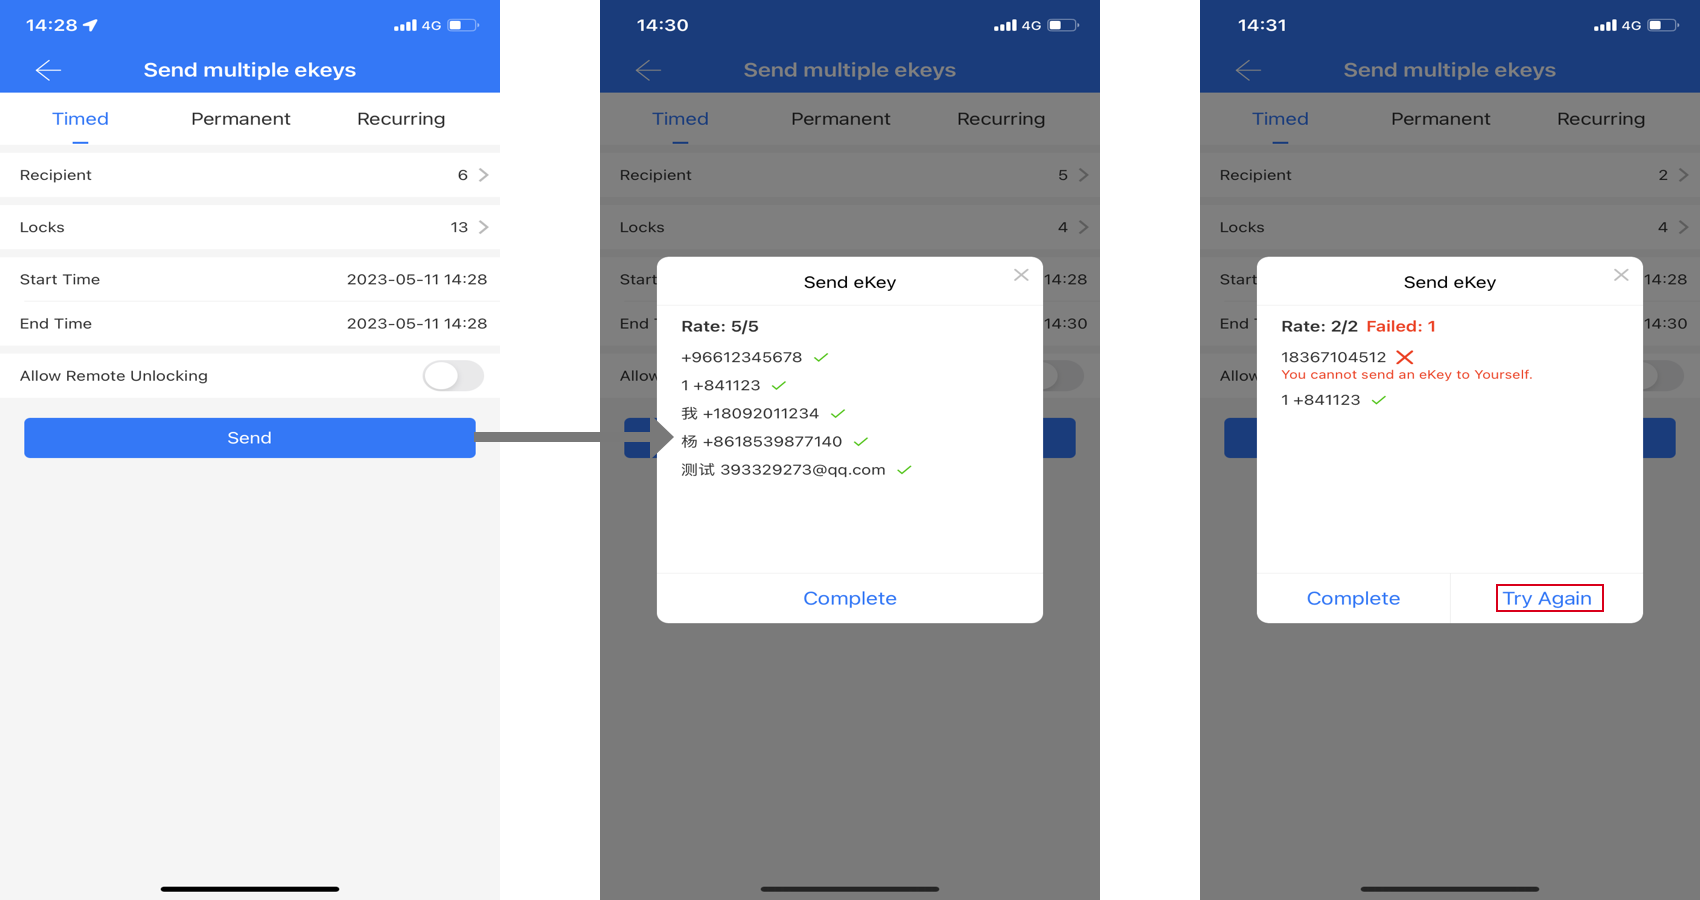
①.There are two entry to send ekeys to multiple users: the bottom right of the "Send eKey" page and the "Lock Users" in the App "settings" menu.
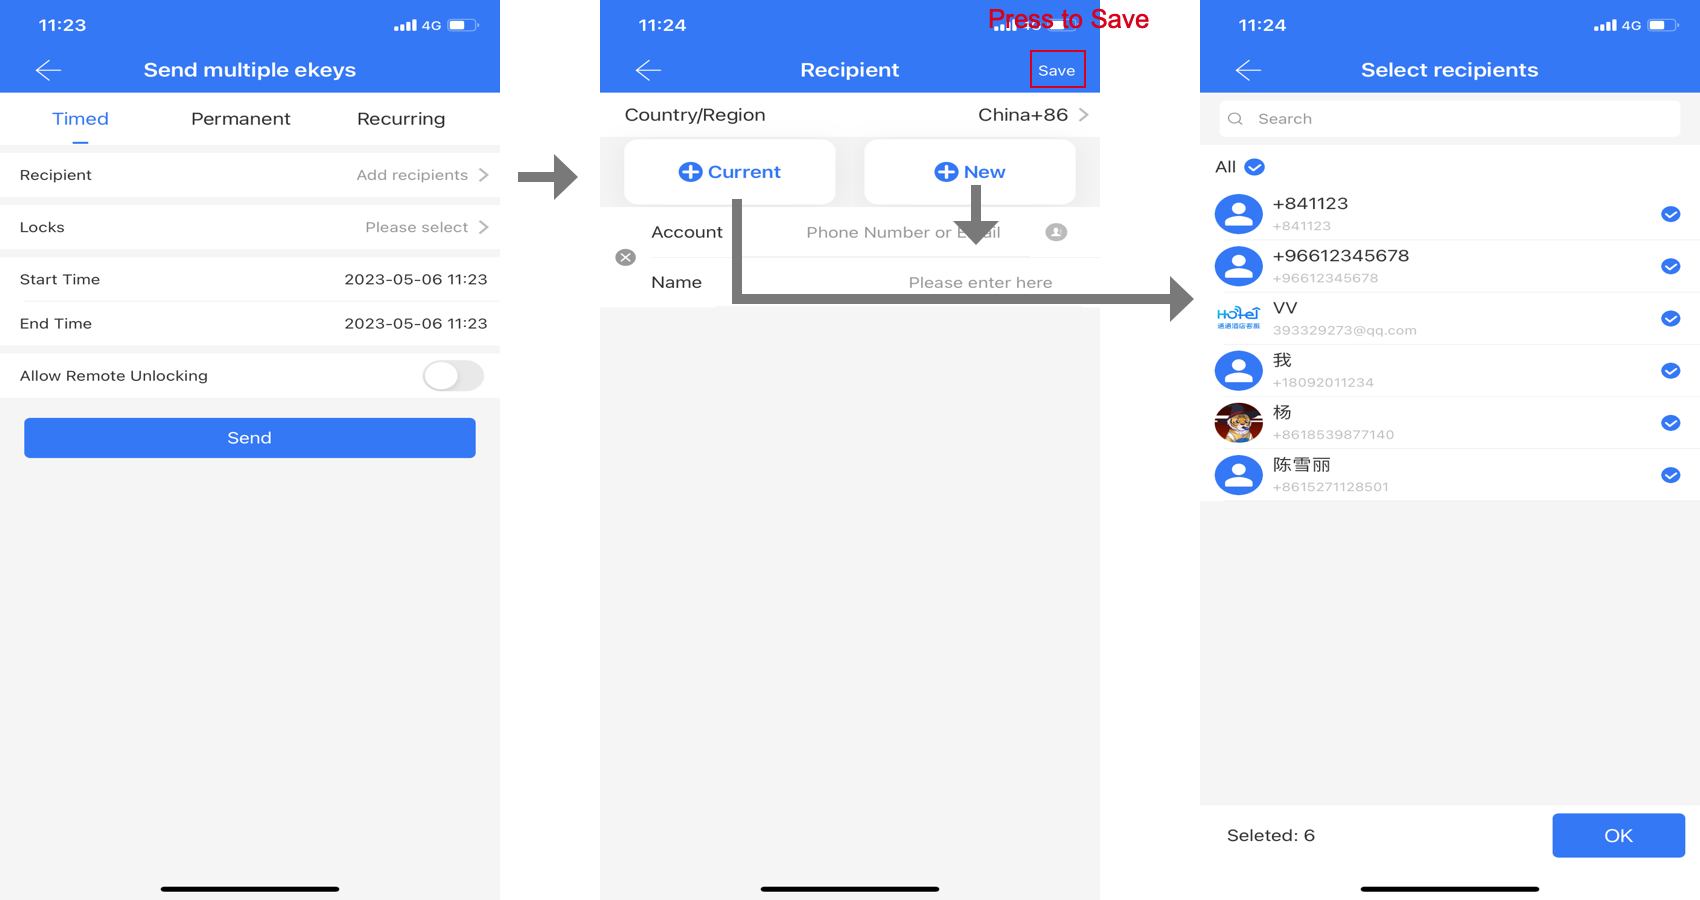
②.You can add multiple recipients and multiple locks. All these locks' ekeys will be sent to these recipients.
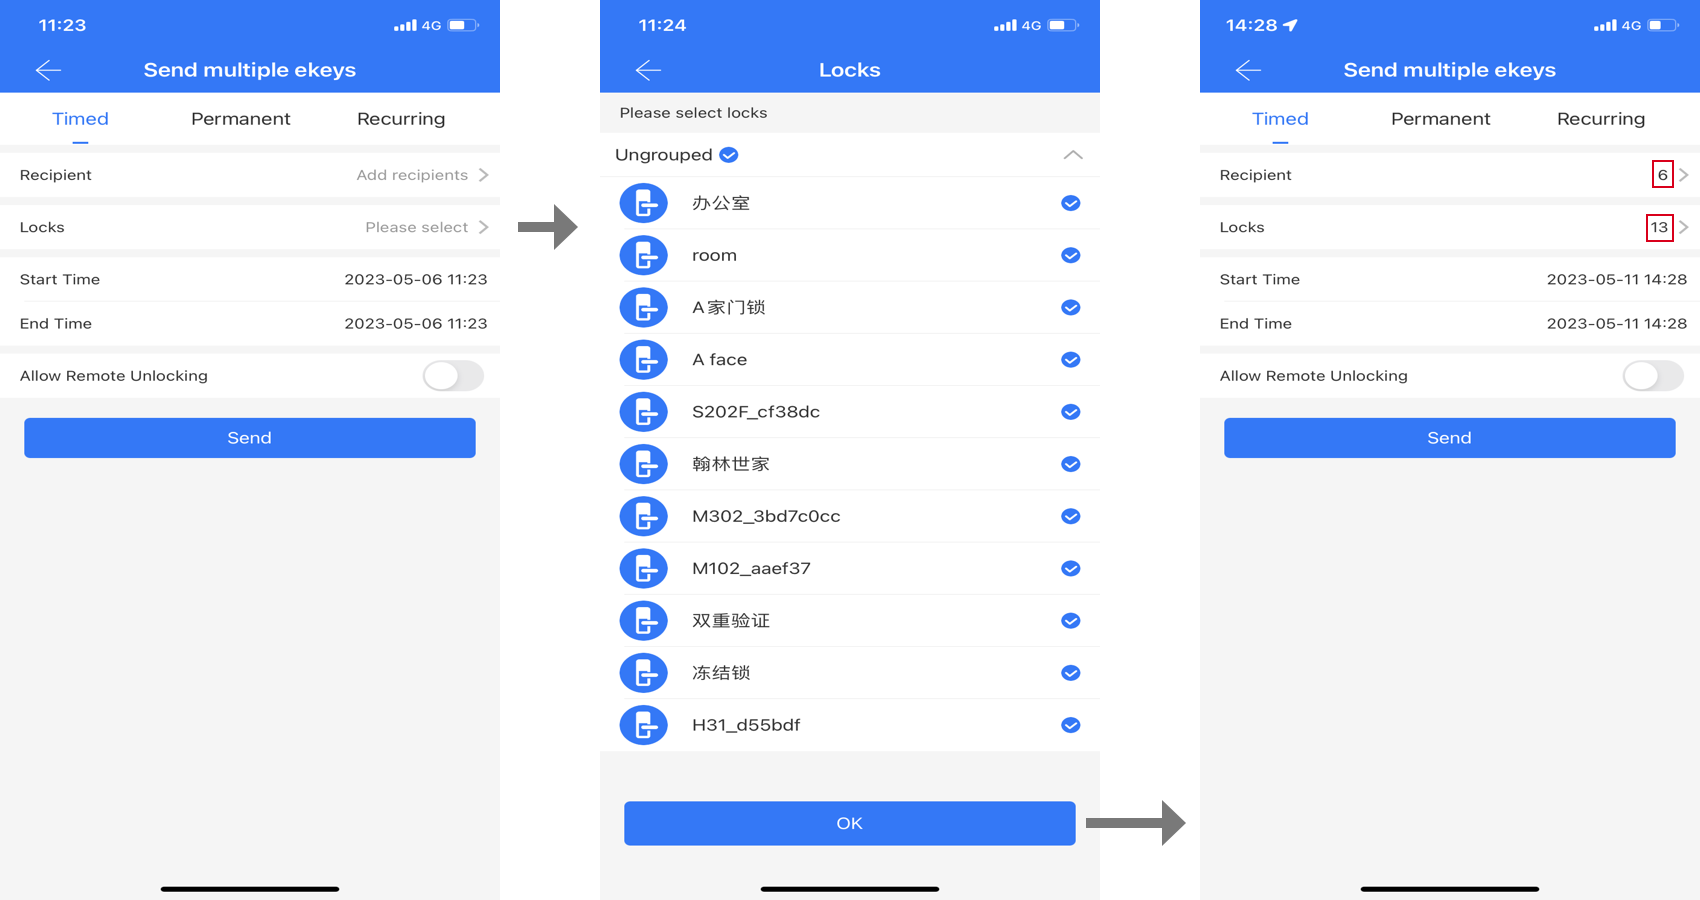
③.The ekeys will be sent one by one. You can retry if failed.
Room status
functions:Mark the room as vacant or occupied
Steps:
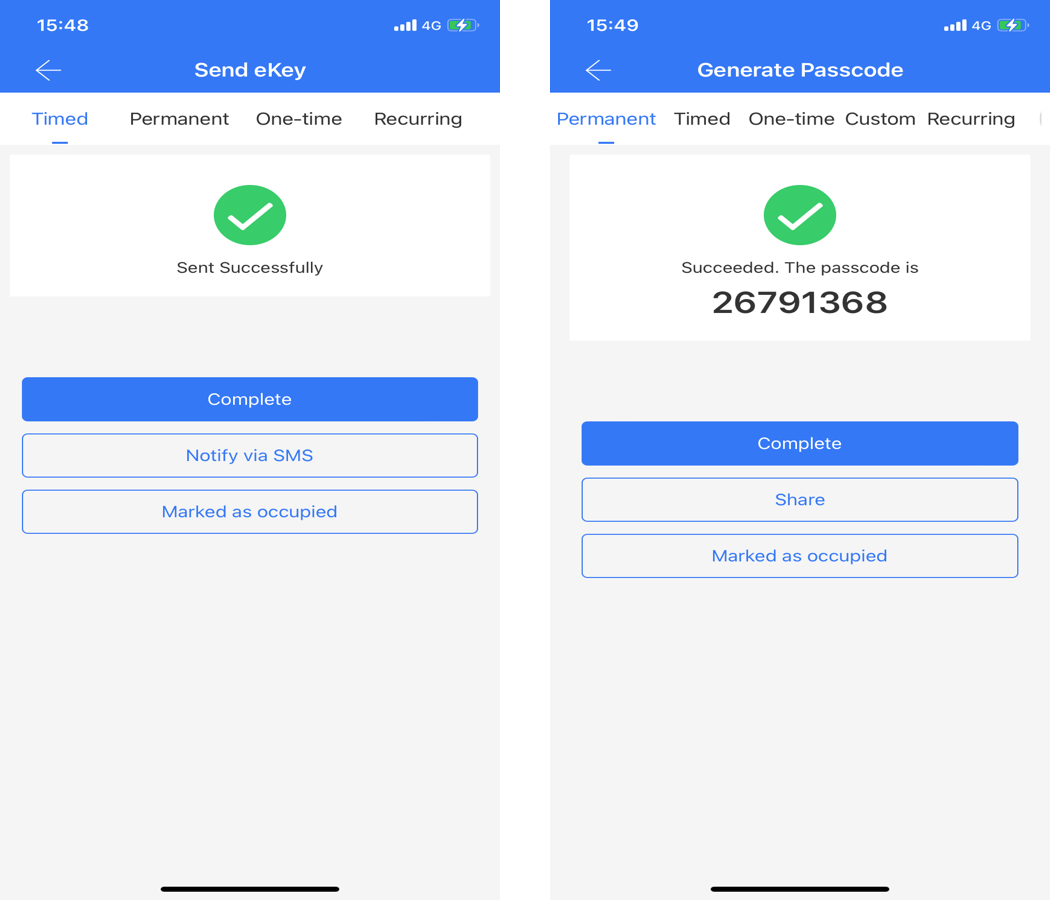
①.You can use the quick button "Mark as Occupied" located at the bottom after sending ekey or creating passcode.
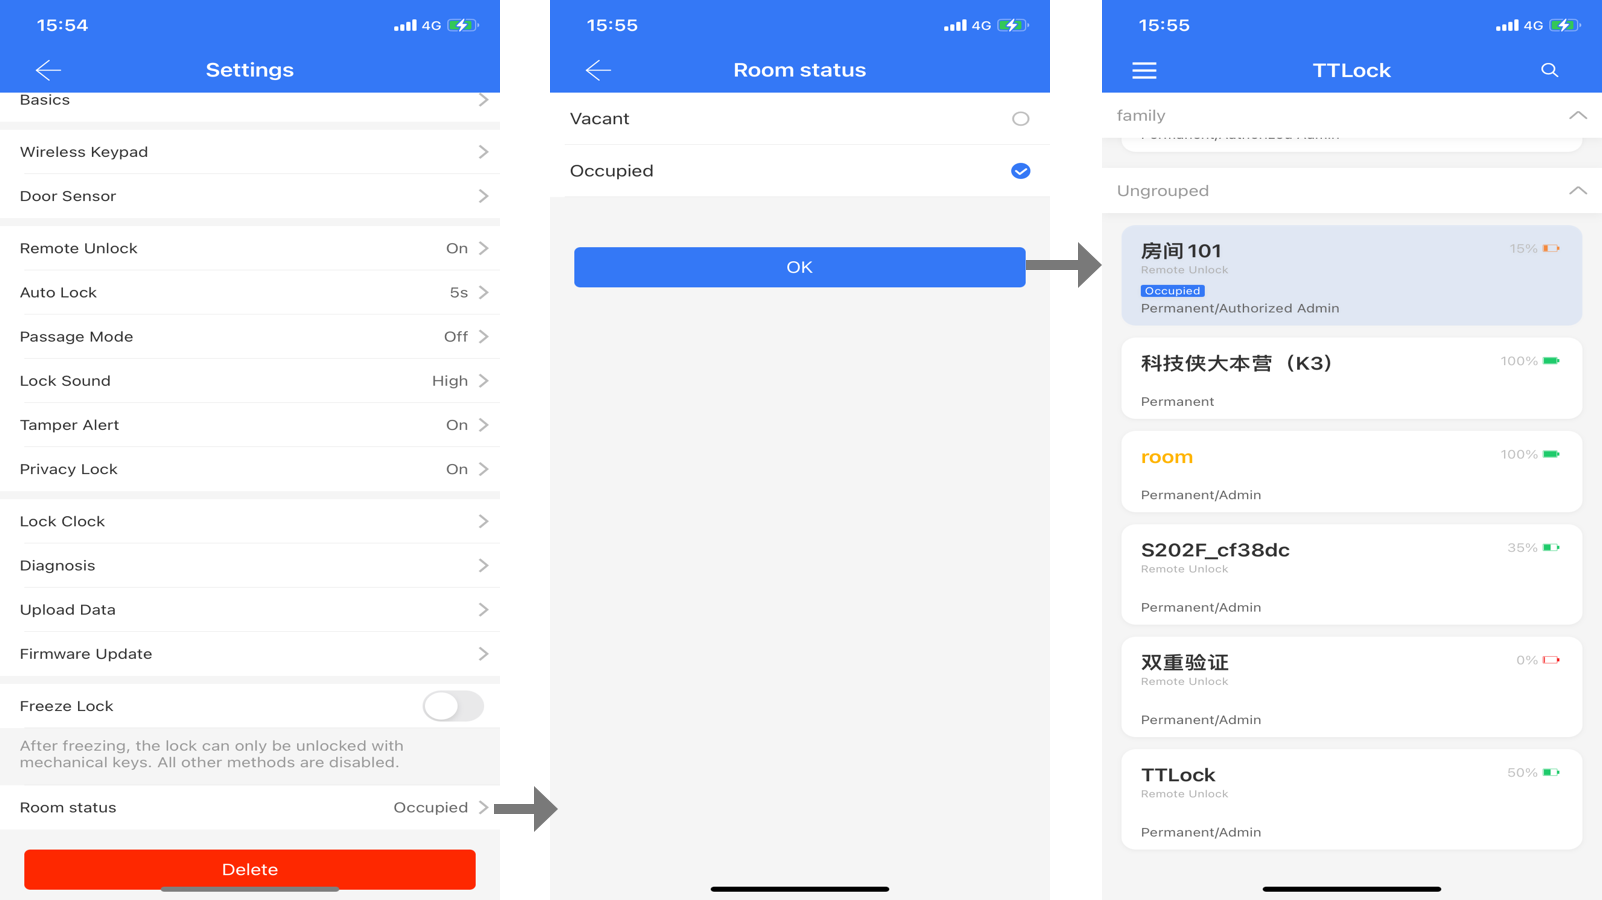
②.To mark the room status again, go to the lock settings and select "Room status" to set the room status.
③.Once the room status is marked, go back to the homepage where the "Occupied" status is displayed, differentiated by a visually distinct color. This will reduce the time to find a currently vacant room.
Card encoder
functions:Add building and floor information to locks using the app for card issuing with a card encoder.
Steps:
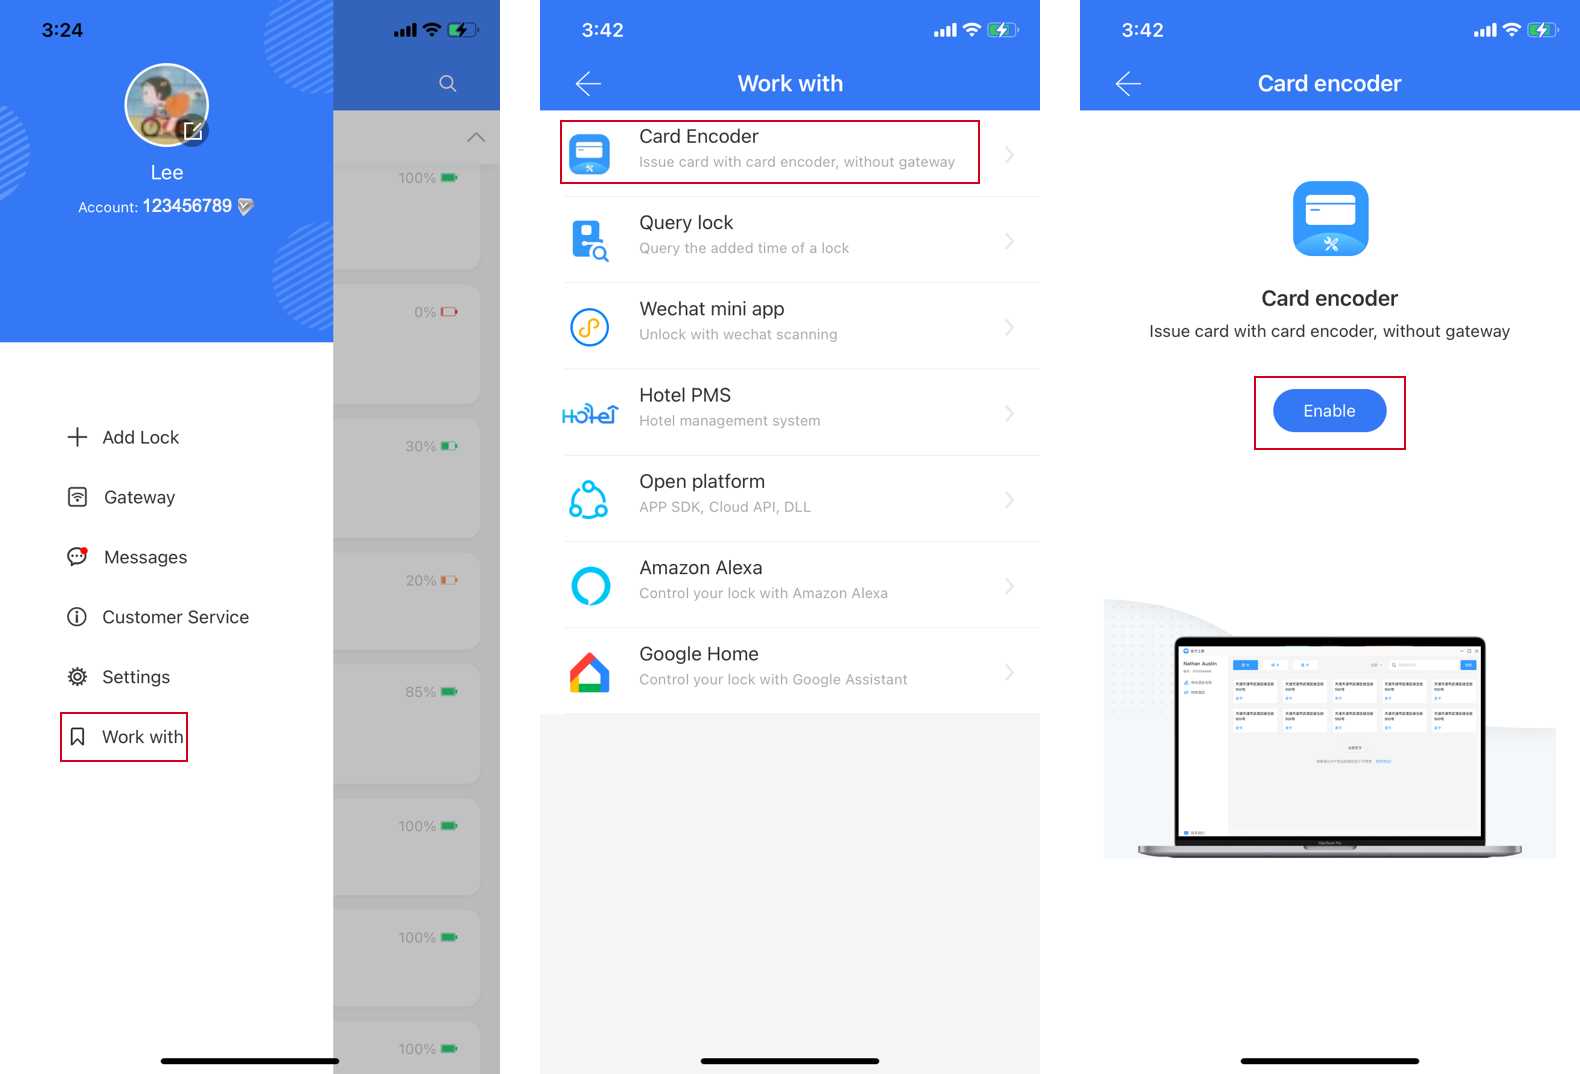
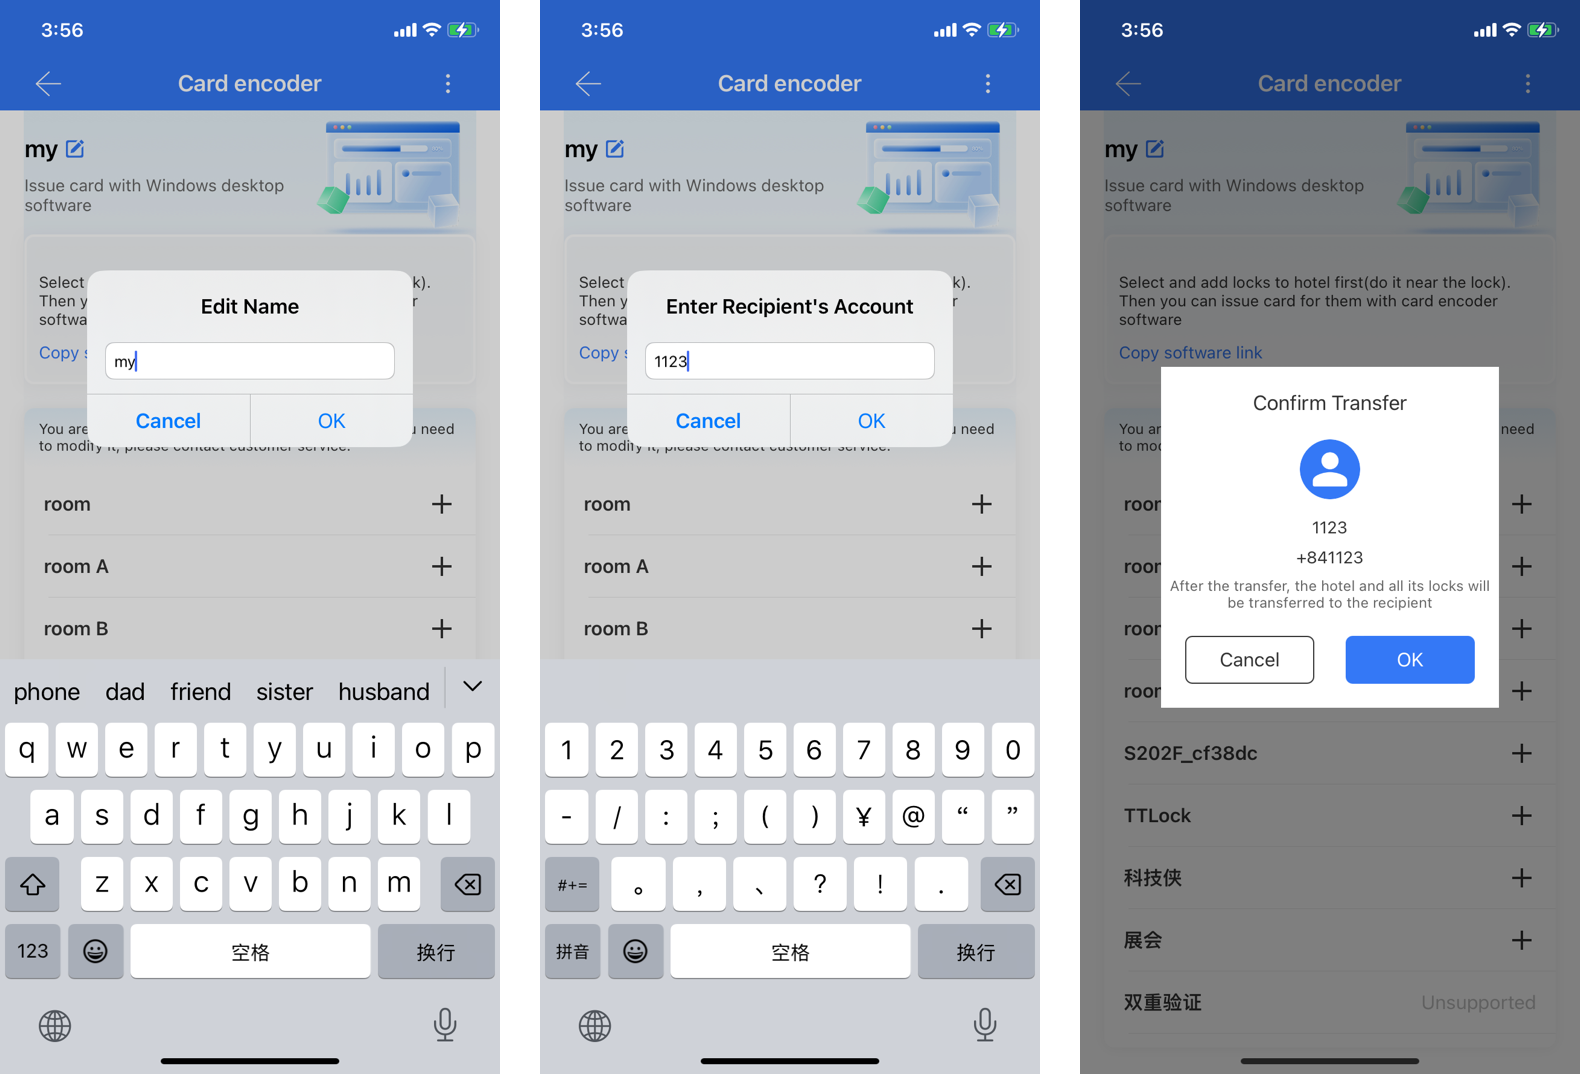
①.Click "≡" -> "Work with" -> "Card Encoder", and create a hotel.
*To change the hotel name, click on the edit icon next to the hotel name and enter the new name in the pop-up box.
*To transfer the hotel, click on the "⫶" icon in the top right corner, then select "Transfer Hotel" enter the recipient's account, verify the information, and complete the transfer after identity verification.
*To delete the hotel, click on the "⫶" icon in the top right corner and select "Delete Hotel".
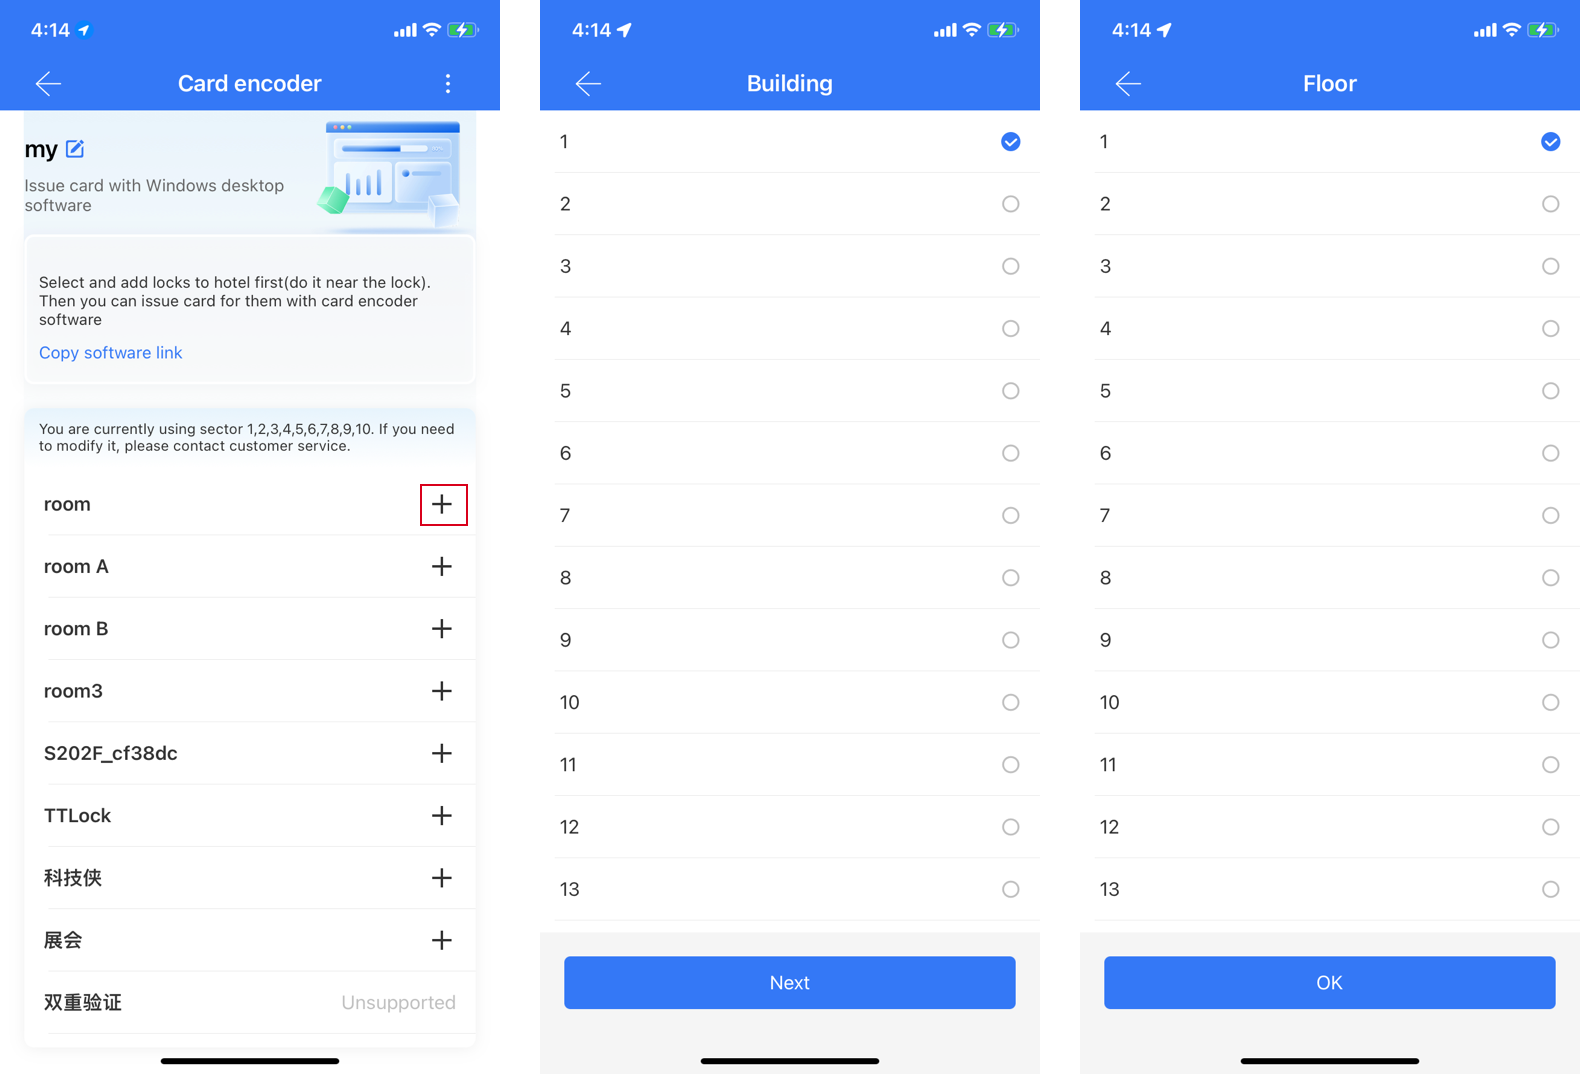
②.Click on the "+" button to add the lock to the hotel and select the building and floor information.
③.Copy the download link and install the software on your computer. Then you can issue cards with it.
Scenario reminder
functions:When specific scenes are triggered, the system will send reminder messages to designated recipients.
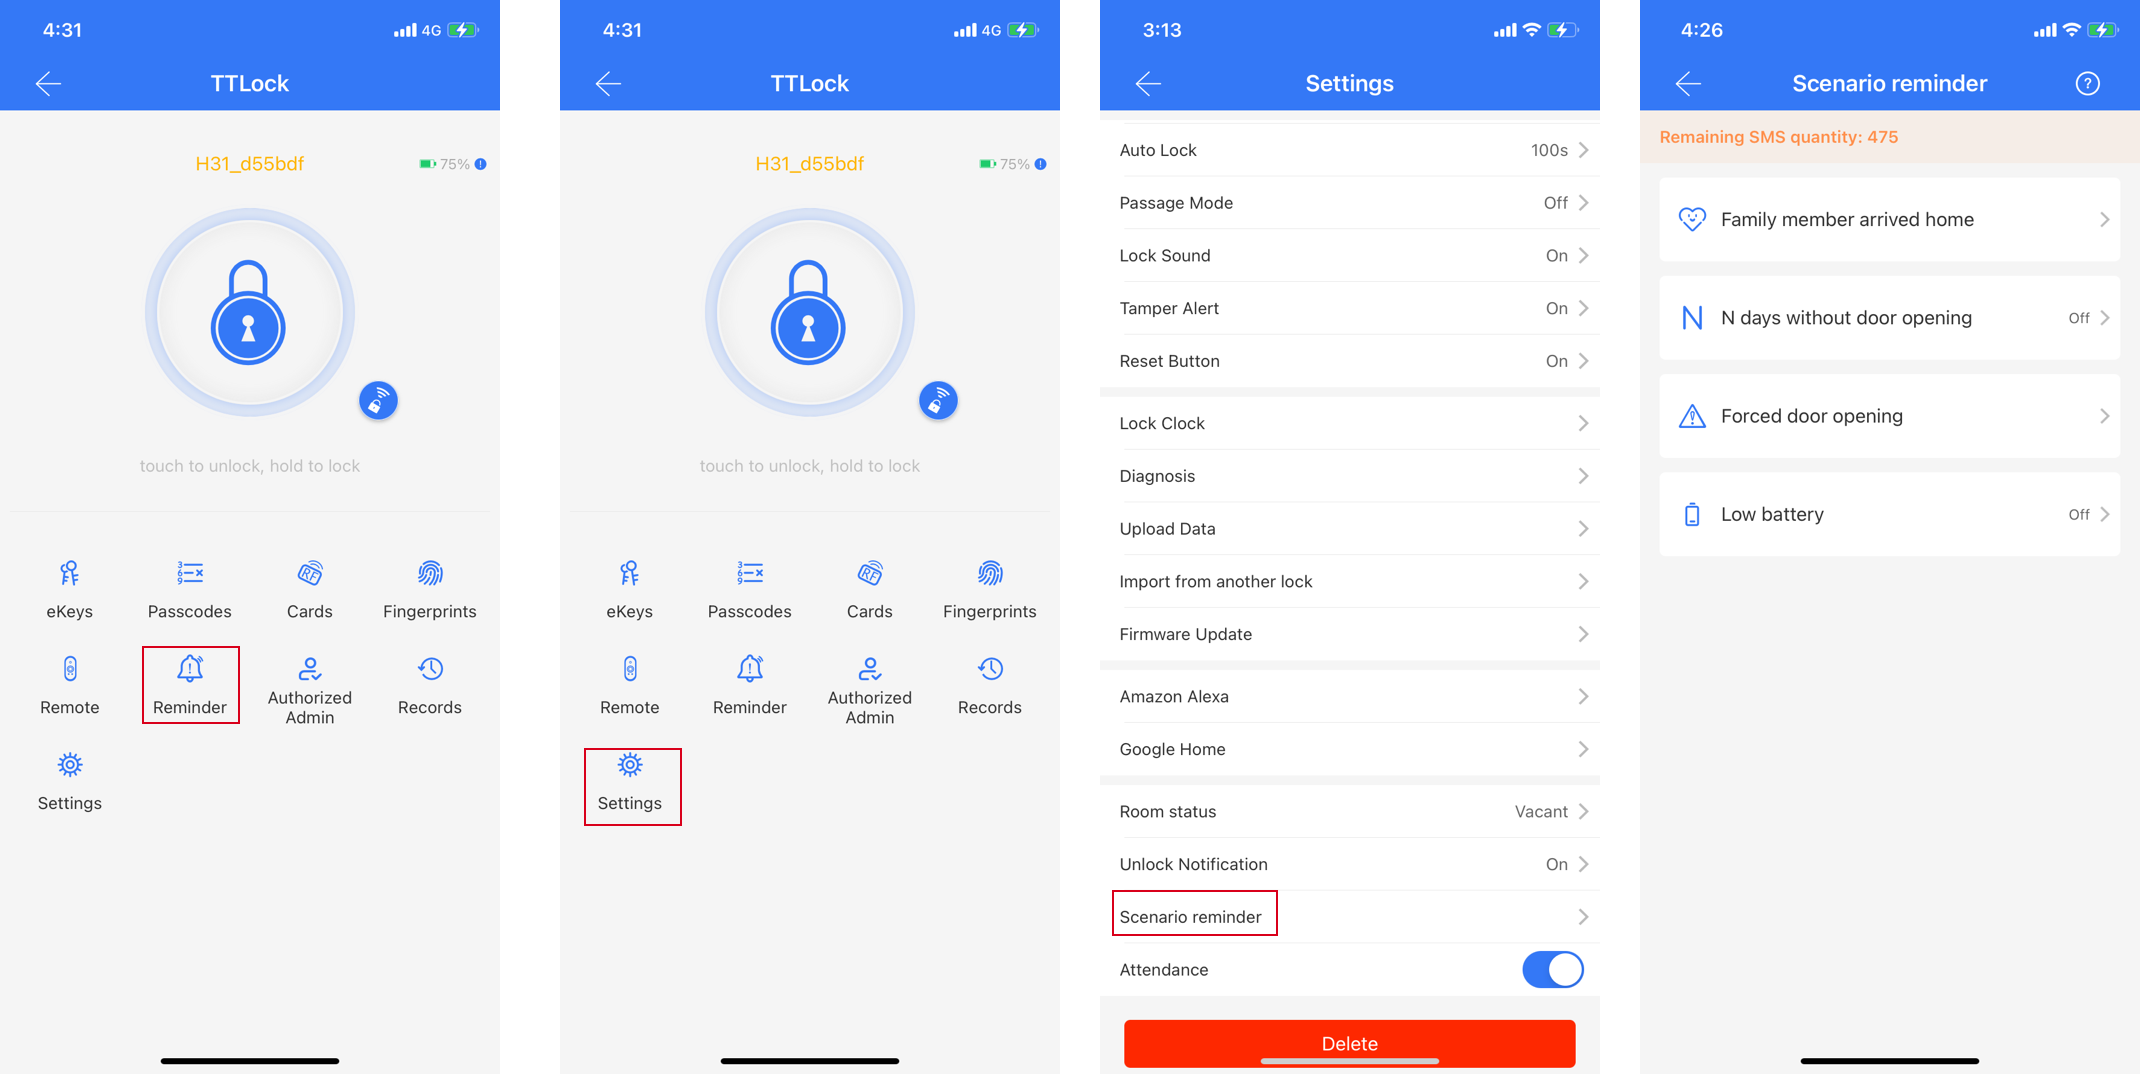
Steps:Click on the "Reminder" button on the main page,or click on the "Settings" option on the main page, then go to "Scenario Reminder" to see four scenarios: Family member arrived home, N days without door opening, Forced door opening, and Low battery.
a.Family Member arrived Home
functions:To receive reminder messages when family members arrive.
Steps:
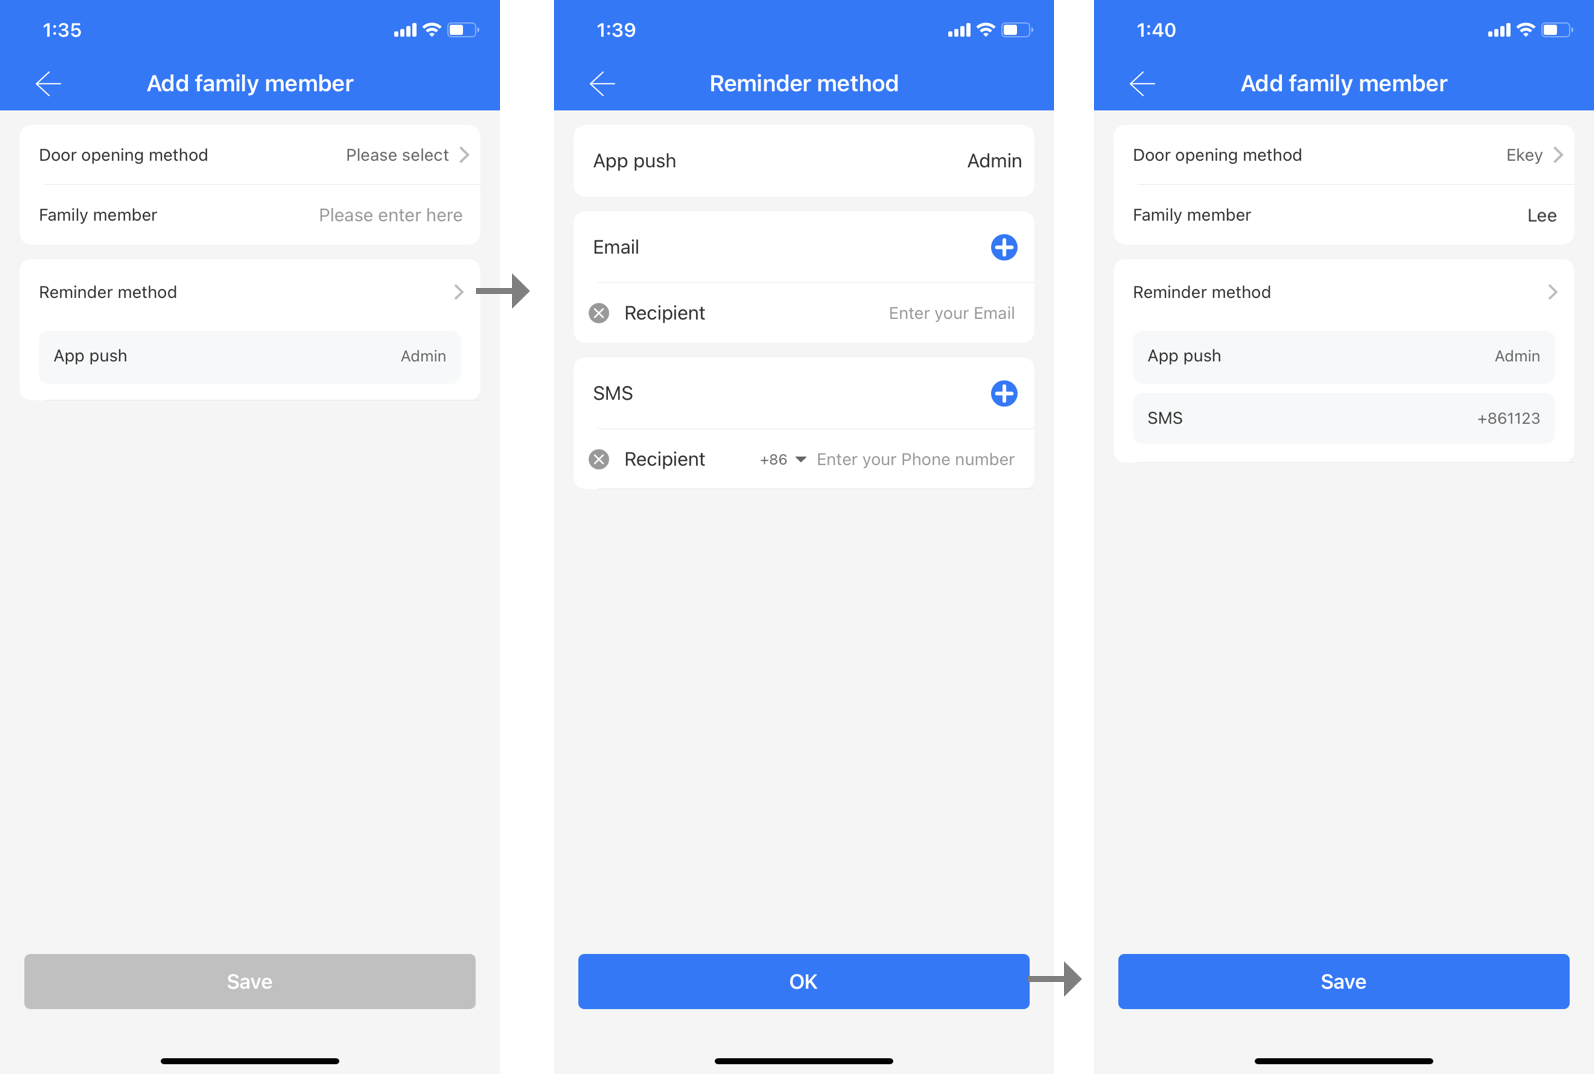
①.Click on "Add family member" at the bottom of the "Family member arrived home"page, select the door opening method (ekey, passcode, card, fingerprint, etc.). (If you choose a method other than the ekey, the lock needs to be connected to the network to receive notifications.)
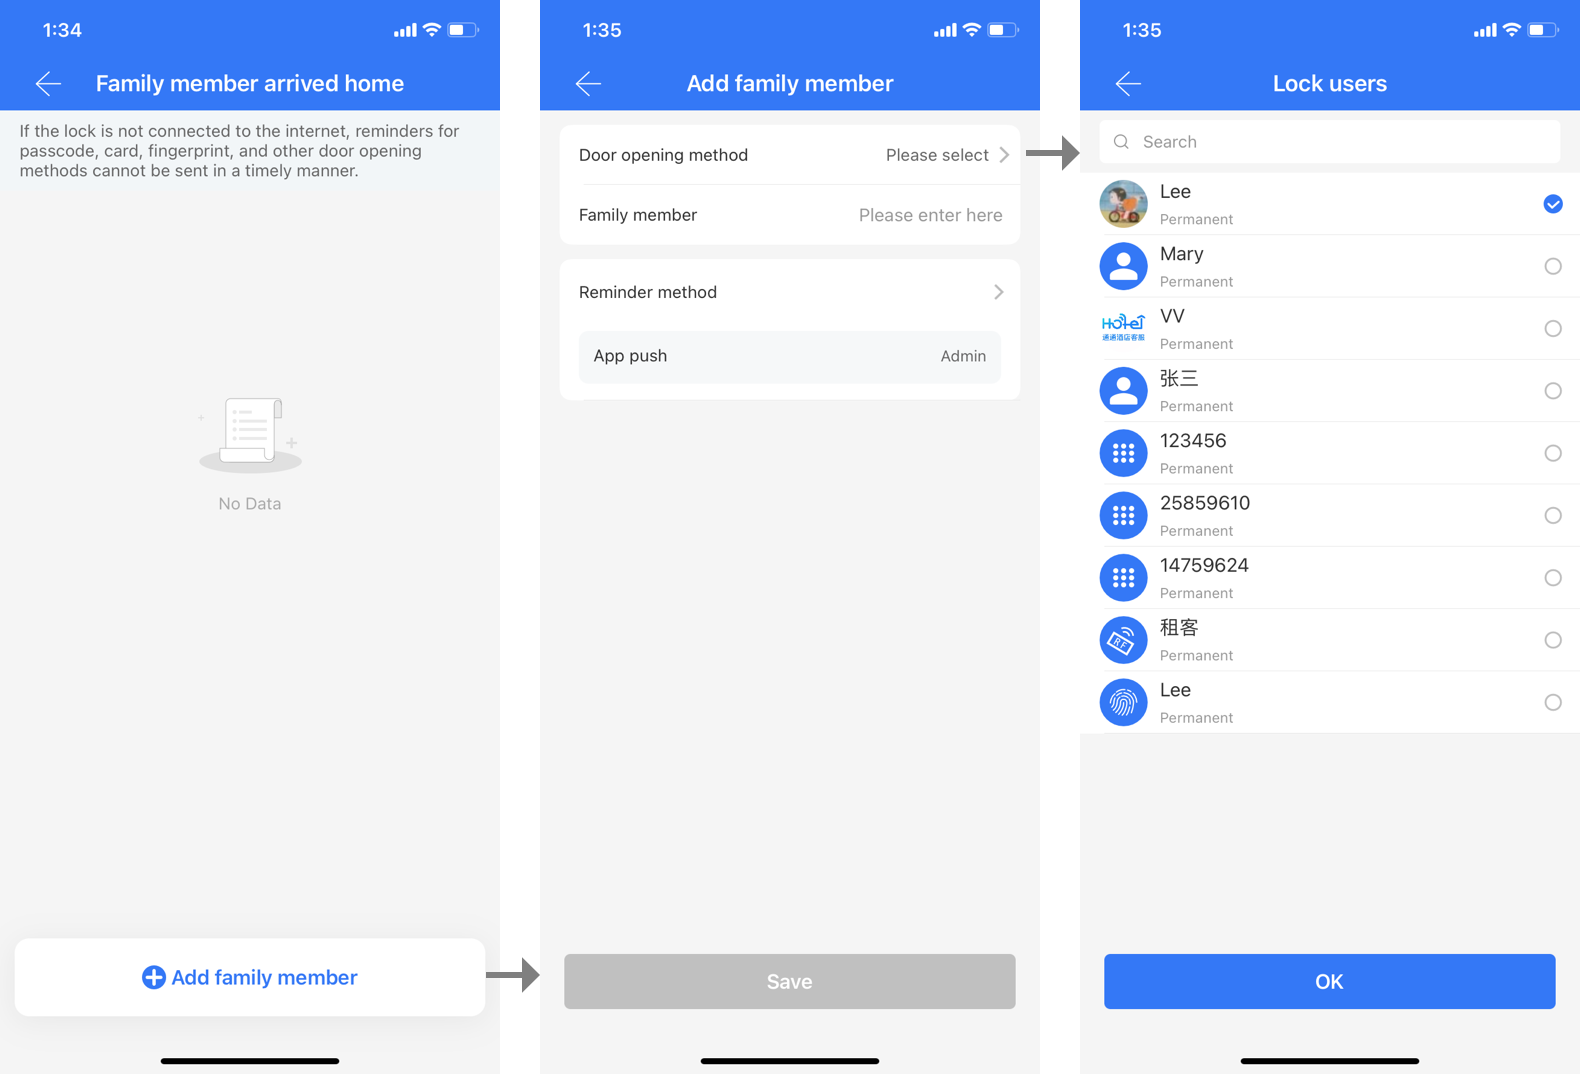
②.Select a reminder method. By default, the app will send reminder messages to the administrator. You can also choose to receive SMS or email reminders, with a maximum of three additional recipients. (App push and email reminders are free, while SMS reminders require purchasing SMS credits.)
③.After filling in the information, click on "Save" to activate this feature.
④.If you need to modify the information, you can do so on the family member's "Details" page.
b.N Days Without Door Opening
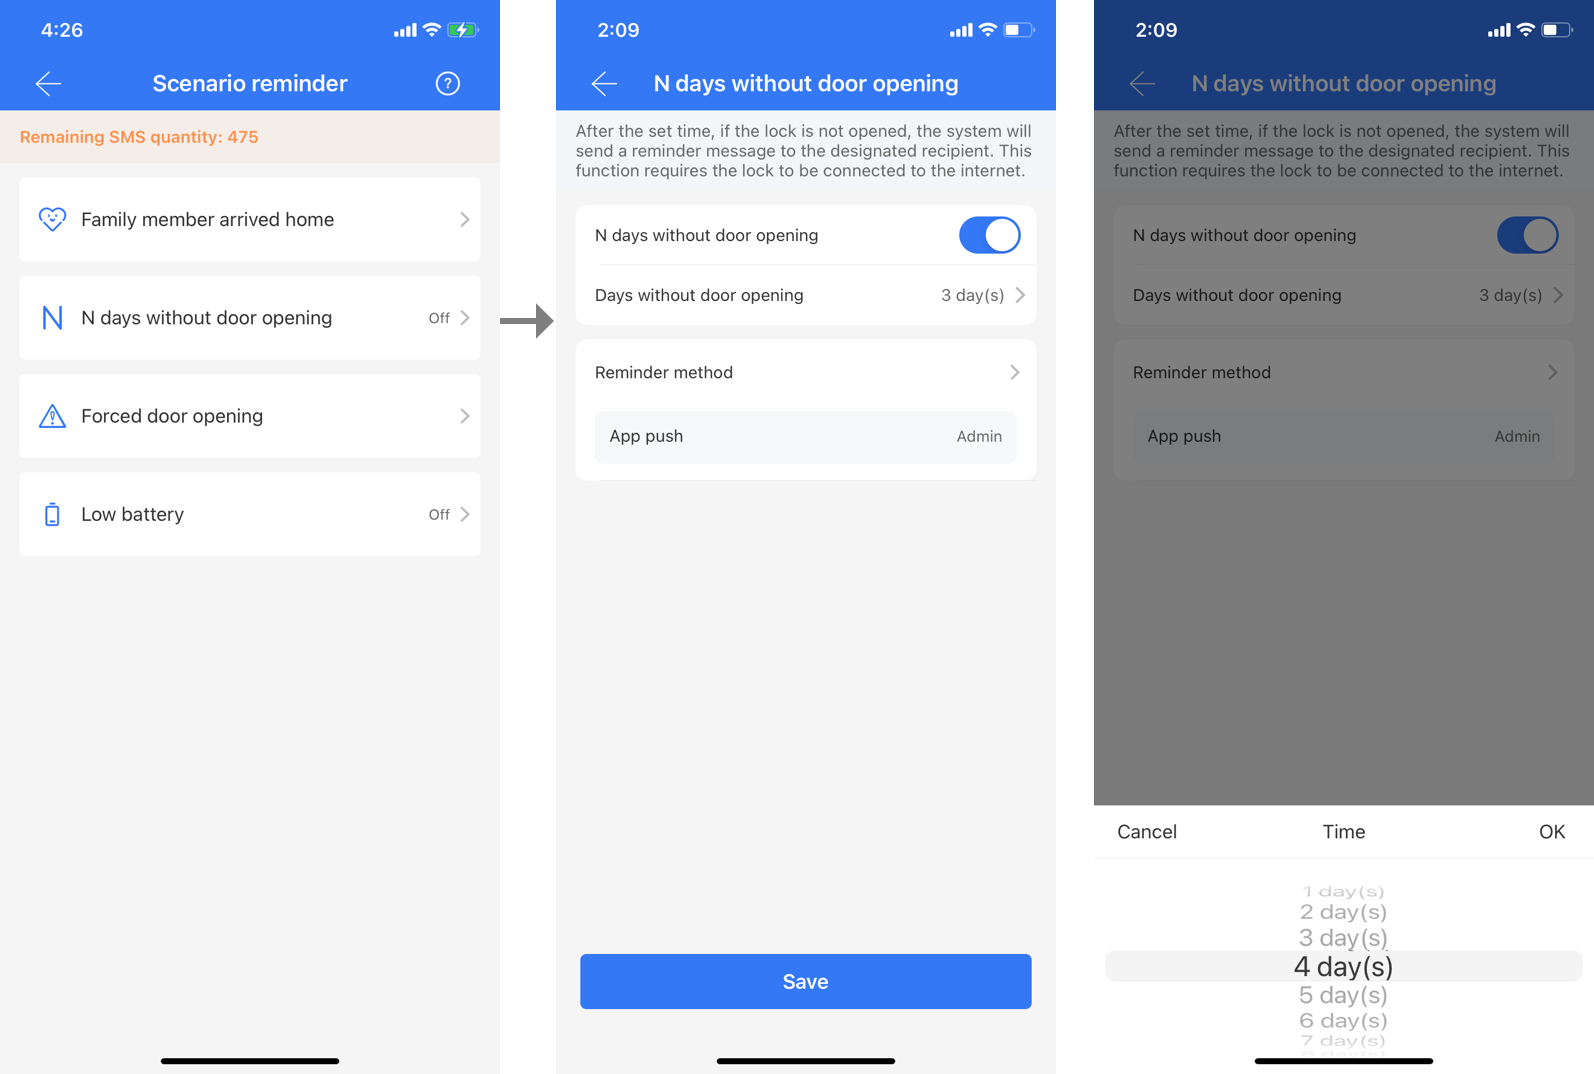
functions:If there is an elderly person living alone at home and no door is opened within a set time, a reminder message will be received.
Steps:Turn on "N days without door opening", set the duration of no opening, add reminder method, and click on "Save".
c.Forced Door Opening
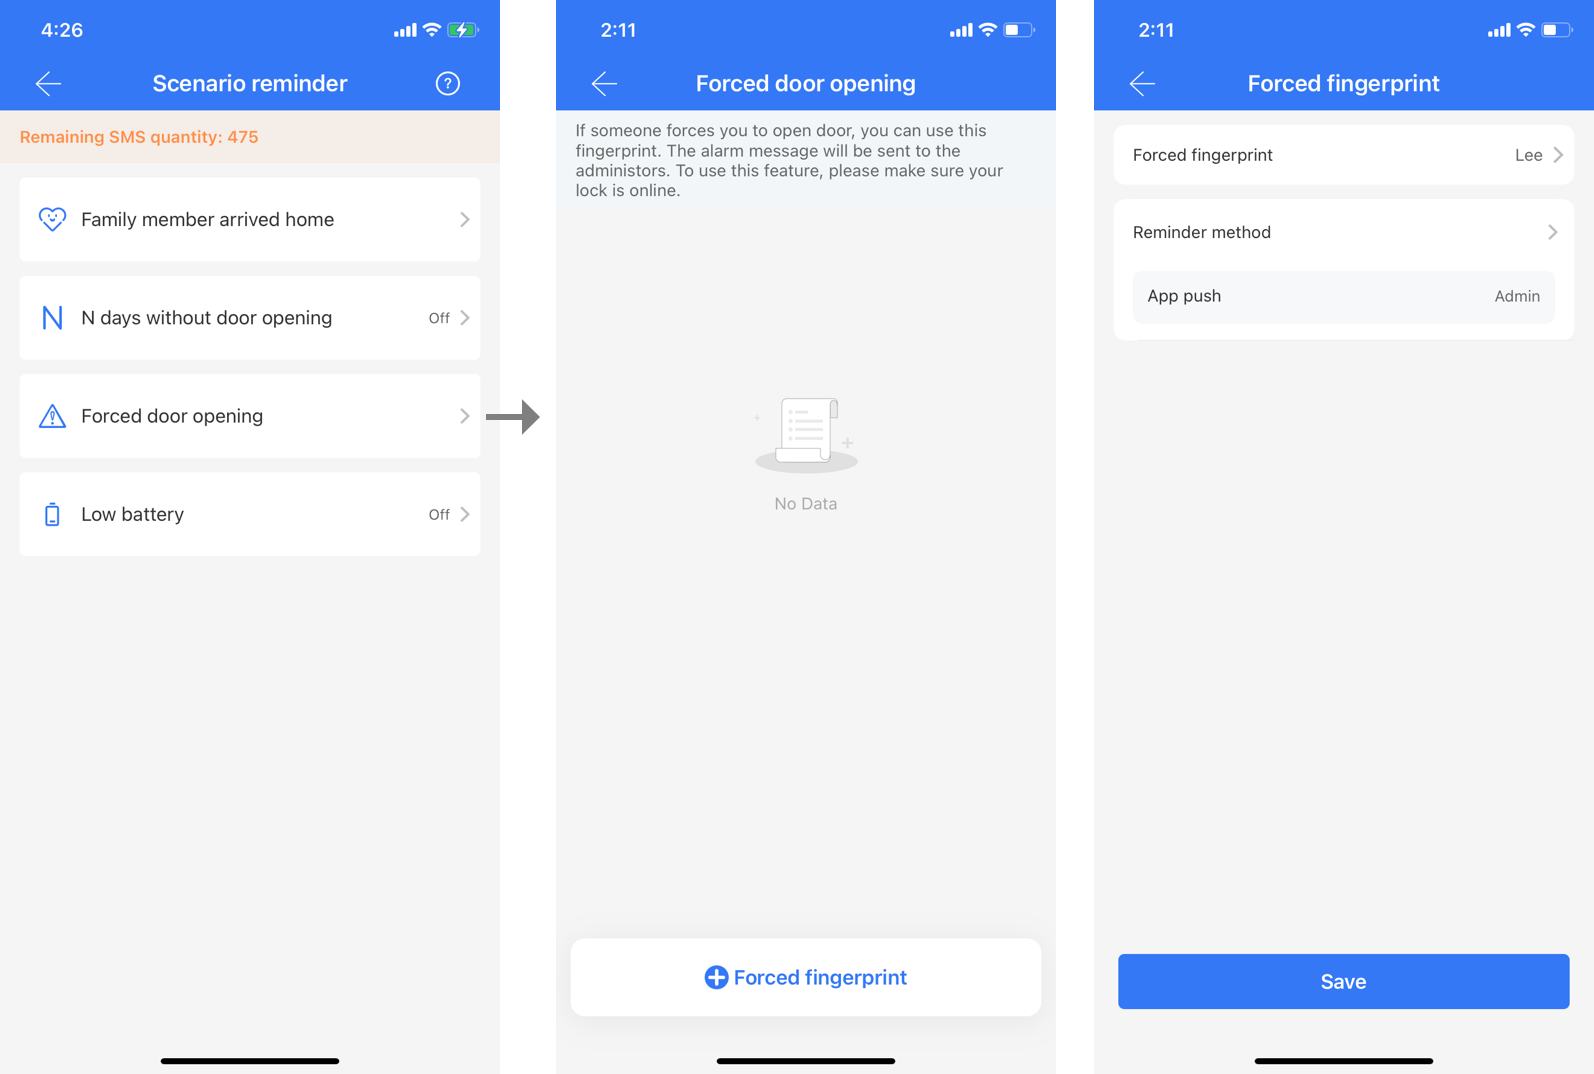
functions:When forced to unlock under duress, a reminder message will be received.
Steps:On the "Forced door opening" page, add fingerprint, select from the existing fingerprint list, set the selected fingerprint as a forced fingerprint, add reminder method, and click "Save".
d.Low Battery
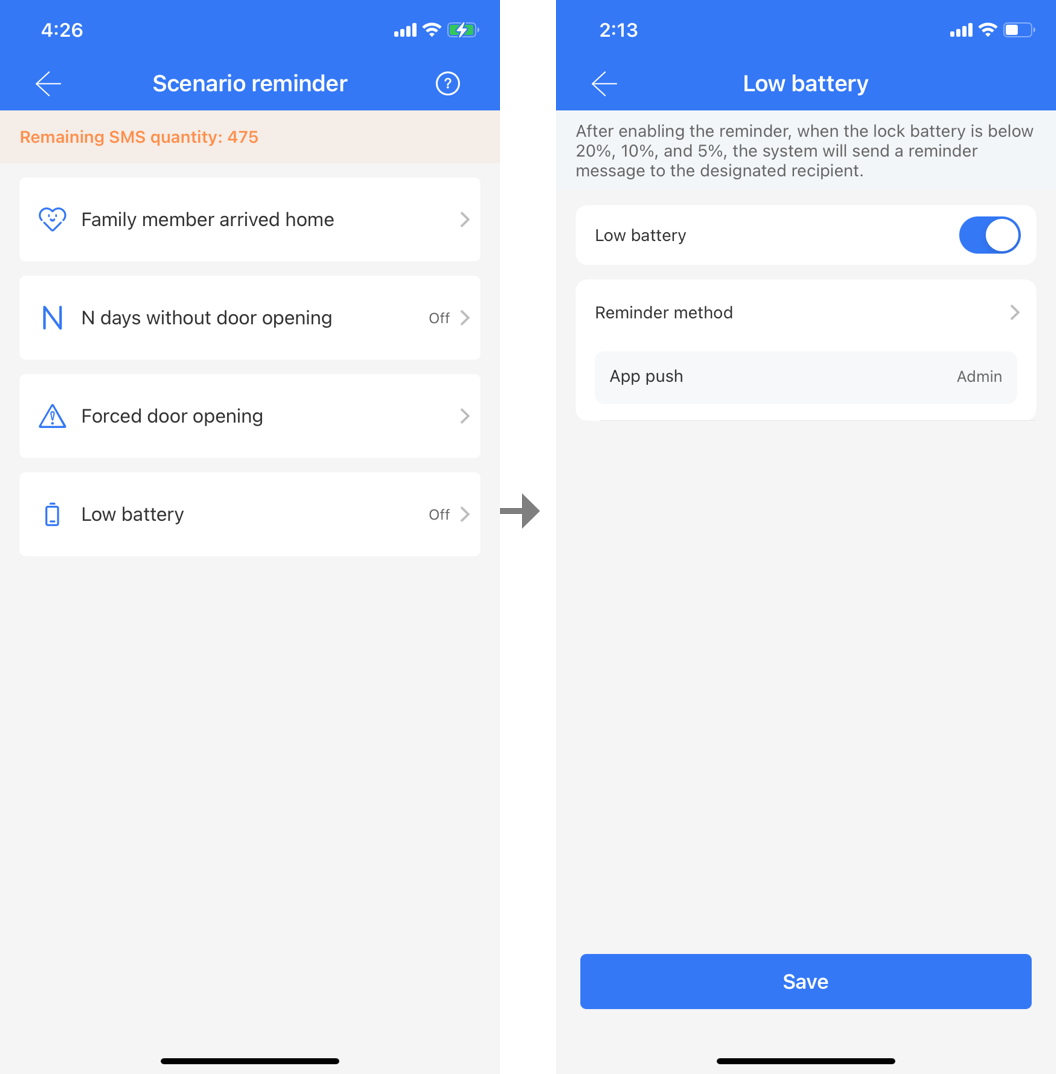
functions:To receive a reminder message when the lock battery is low and needs to be replaced.
Steps:Turn on the reminder for "Low battery" , add reminder method, and click "Save". The system will send reminder messages when the lock battery is below 20%, 10%, and 5% to the designated recipients.
Passage Mode
functions: Passage mode with multiple time periods
Steps:
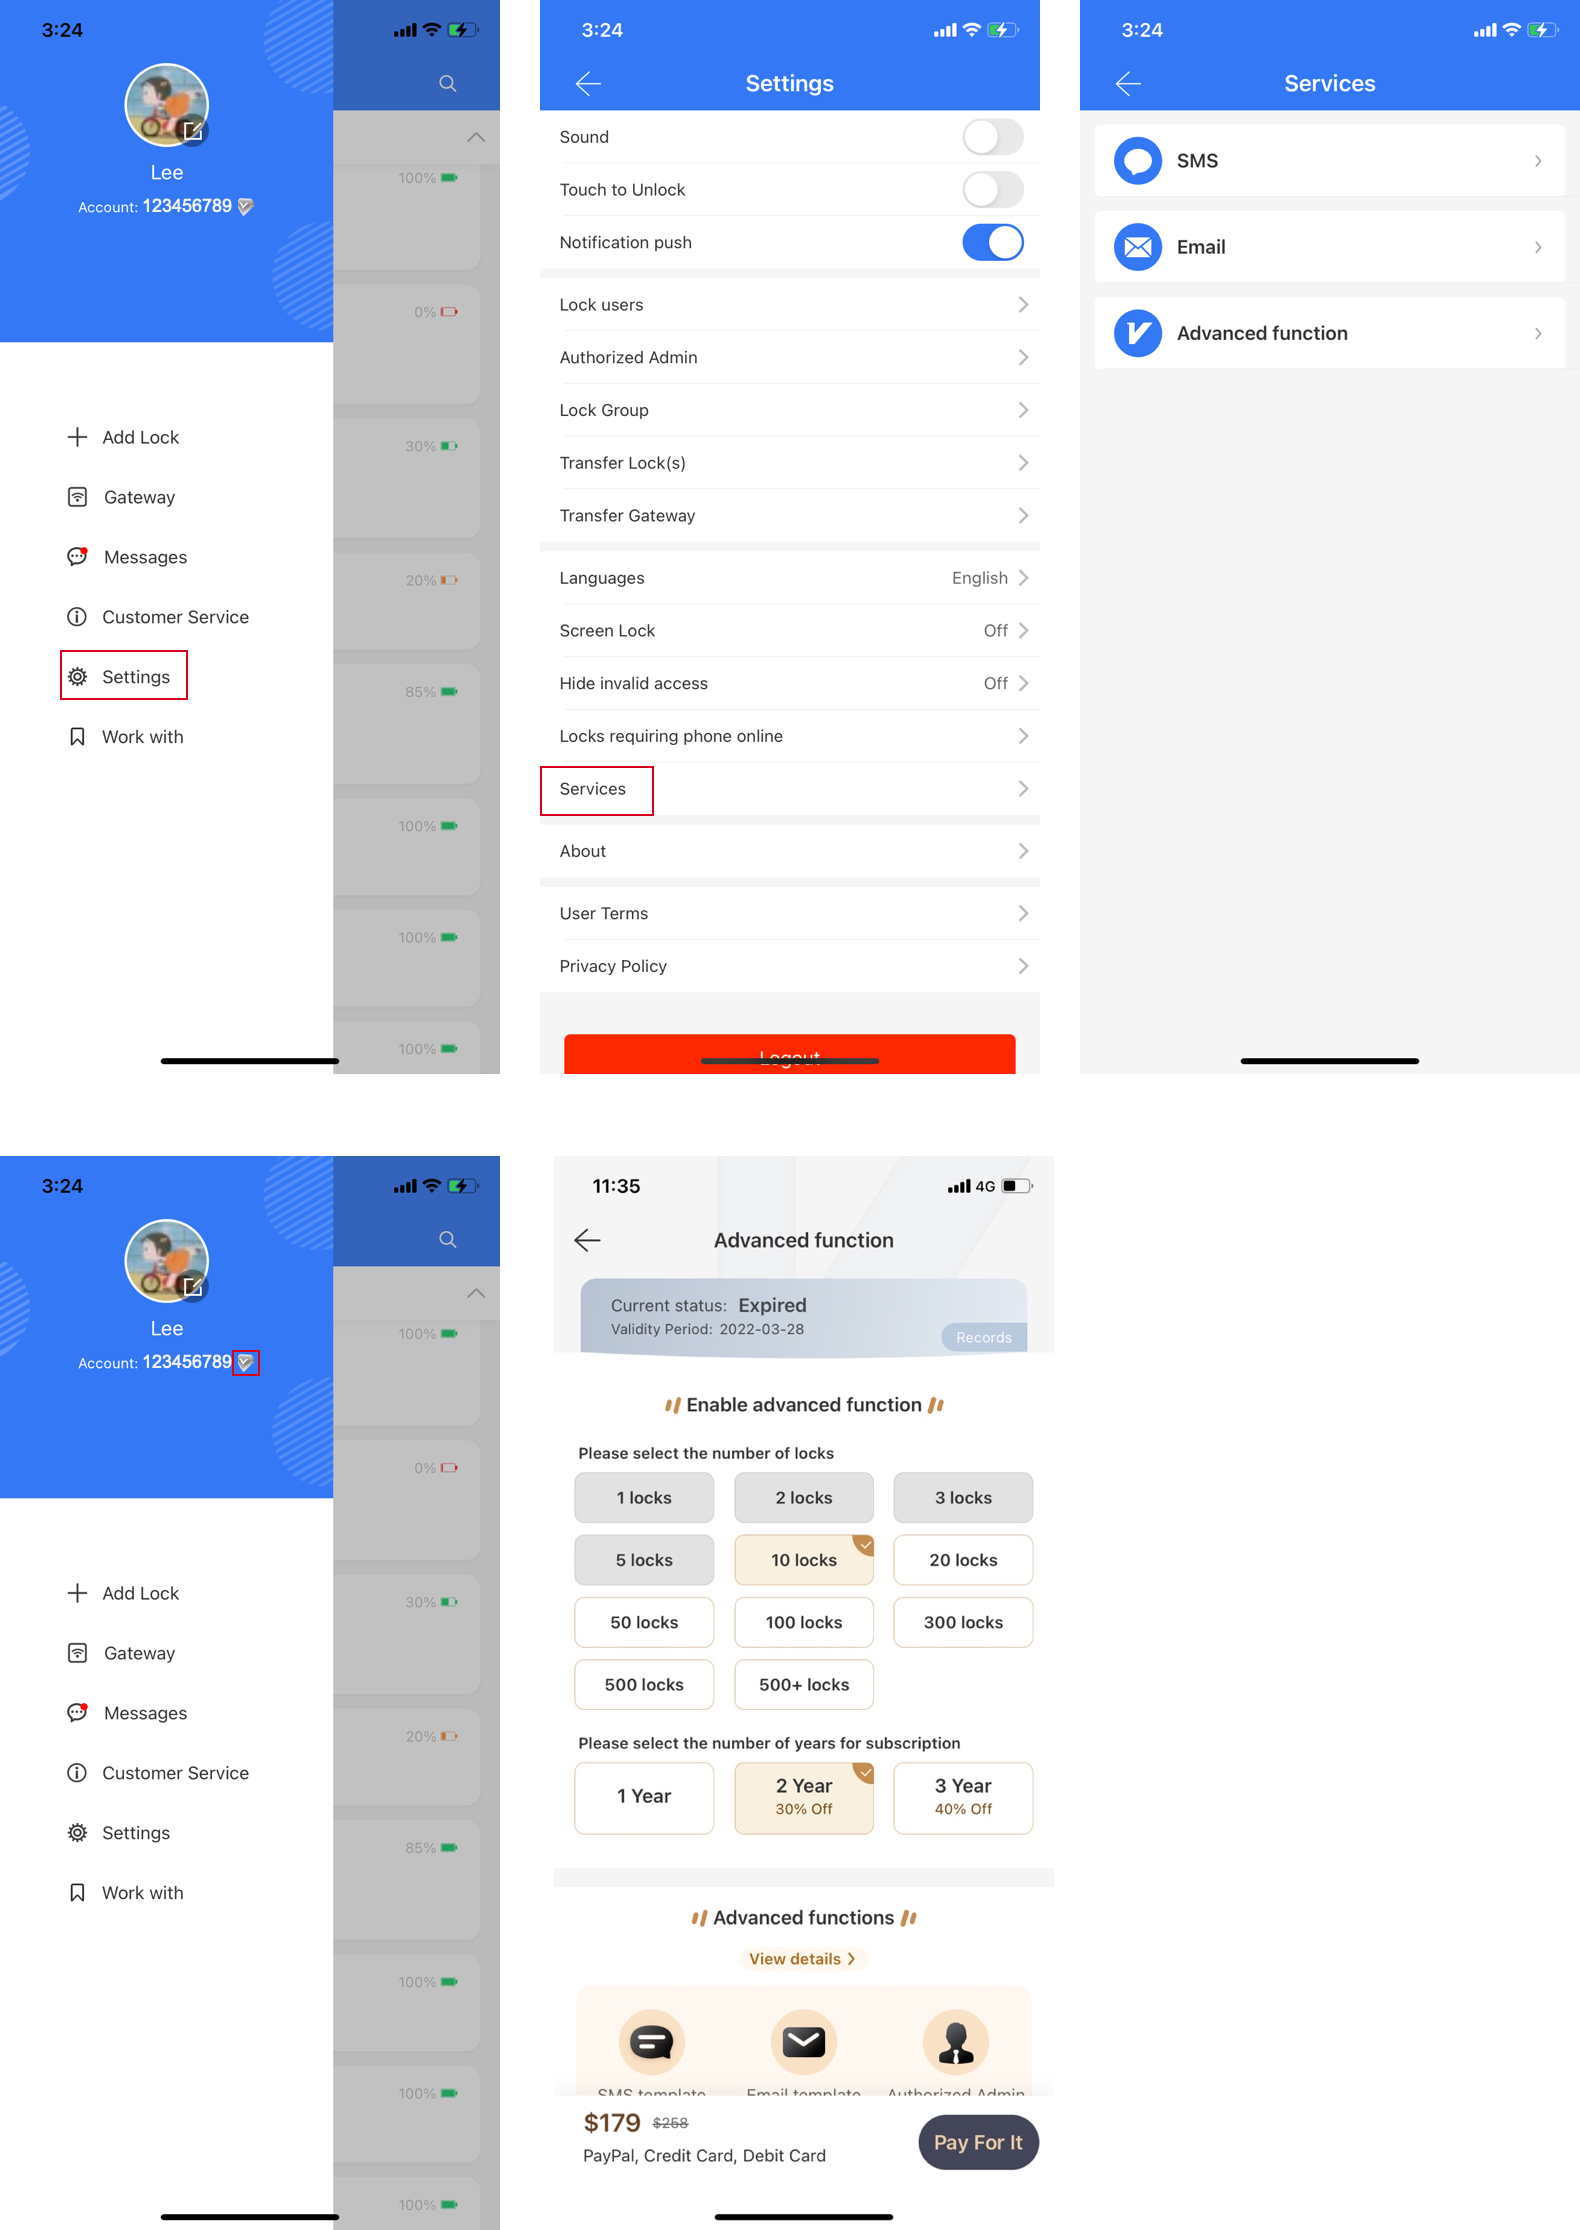
①.Click on "Settings" on the main page, find "Passage mode" and enable this feature.
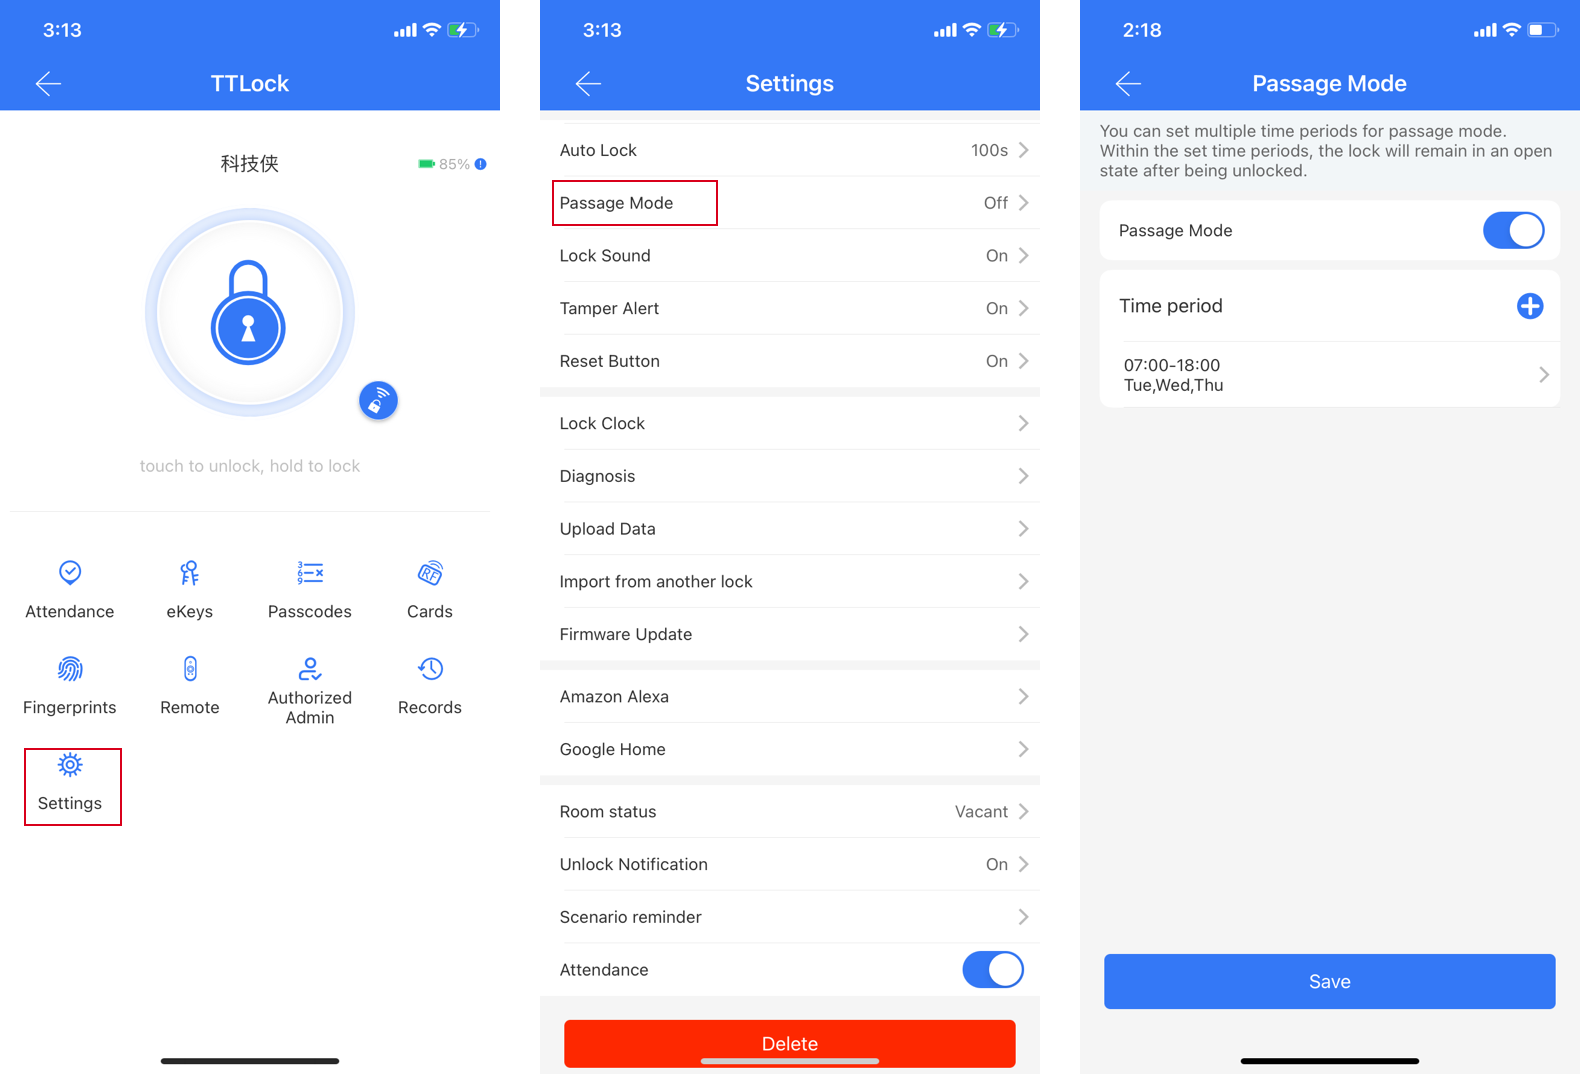
②.Set the time periods for passage mode by clicking on the "+" icon, go to the time period setting page, select the days and time, and click on "OK". Up to 5 constant opening time periods can be set.
